A turntable setup guide comes down to geometry and discipline, not magic: level the plinth, zero the tonearm, then dial tracking force, anti-skate, overhang, azimuth, VTA, and speed in that order. Get those six adjustments inside spec and a mid-tier deck will out-resolve a careless high-end one. On the table I run, a fresh alignment dropped audible inner-groove distortion to near nothing — and it cost nothing but an hour and a protractor.
I set up turntables the way a setup tech does, not the way an unboxing video does: gauge first, romance second. This is the master guide to the whole calibration chain, and each adjustment links out to its own deep dive. Read this top to bottom once, then keep it open as a checklist the next time you mount a cartridge.
The Setup Order That Actually Matters
Most beginners start by buying a better cartridge. That is the last thing that moves the needle. The honest order of return is cleaning, then setup, then the phono stage, then the cartridge, then the table itself. Setup sits second because it is free and it unlocks whatever the rest of the chain can do. A $300 cartridge tracking at the wrong force with no anti-skate sounds worse than a $90 one set correctly.
Calibration is a sequence because each step depends on the one before it. You cannot set tracking force until the arm is balanced. You cannot judge azimuth until the cartridge is roughly aligned in the headshell. You cannot trust your VTA-by-ear until tracking force is locked. Work out of order and you will chase your tail, re-doing adjustments that drifted because an upstream setting changed. The sequence below is the one I follow on every deck I align, from a Rega P3 to a Technics SL-1200-class direct drive.
Step One: Level the Plinth and Platter
Before a single tonearm adjustment, the deck has to sit dead level. A bubble level on the bare platter takes thirty seconds and prevents two problems at once: a tilted platter throws off anti-skate balance and lets the arm drift toward the low side, and an unlevel deck on a springy shelf is far more prone to footfall skips. Adjust the feet until the bubble centers front-to-back and side-to-side.
Level is also where isolation starts. If your shelf flexes when you walk past, no amount of cartridge alignment will save you from skipping. I cover the full picture in the turntable vibration isolation guide, but the short version is that a rigid, level surface decoupled from the floor does more for playback than most gear upgrades. A wobbly platter bearing makes leveling pointless, so if yours rumbles, sort the bearing maintenance and lubrication first.
Step Two: Mount and Roughly Align the Cartridge
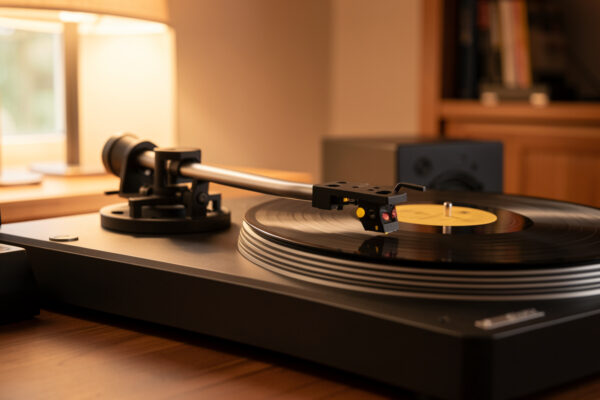
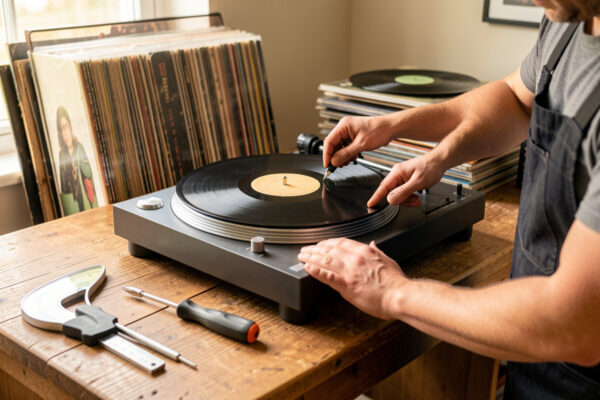
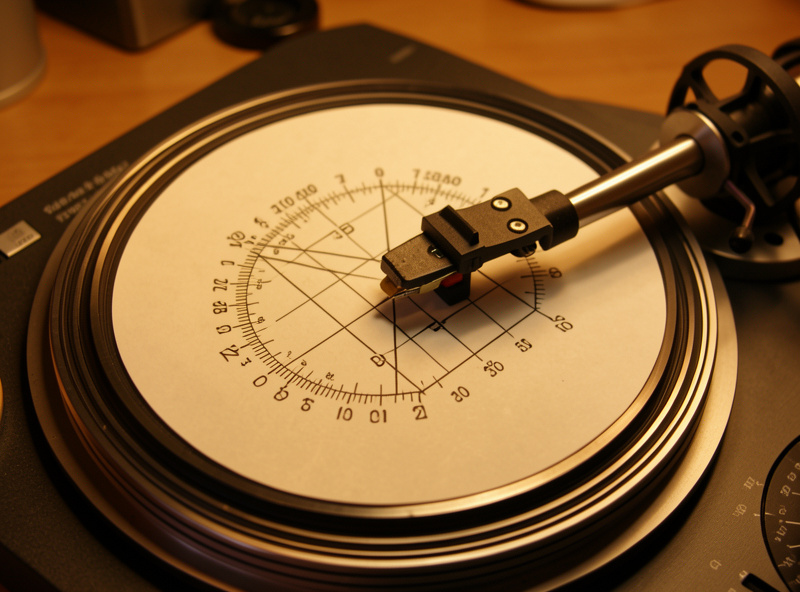
With the deck level, mount the cartridge in the headshell and set overhang and offset angle with a two-point protractor. This is the geometry step, and it is the one people skip with the cardboard alignment card that ships in the box. Don’t. A proper two-point protractor sets the stylus so it traces the groove tangentially at two null points where tracing error drops to zero — Baerwald nulls land at roughly 66.0 mm and 120.9 mm from the spindle.
You are aligning two things: overhang (how far the stylus sits past the spindle) and the cartridge’s angle in the headshell so it sits square to the grid lines at both nulls. Loosen the cartridge bolts a quarter turn, slide and rotate until the stylus drops cleanly onto both null points with the cantilever parallel to the grid, then snug the bolts. My full walkthrough lives in the cartridge alignment guide, and the geometry there feeds directly into azimuth and VTA later.
Step Three: Set Tracking Force (VTF)
Tracking force is the downward weight the stylus presses into the groove, and it is the single most consequential number in the whole setup. Too light and the stylus skips and mistracks, carving distortion into your records; too heavy and you accelerate wear and dull the high end. Most moving-magnet cartridges want somewhere between 1.5 and 2.0 grams — an Audio-Technica VM95 family stylus sits happily at 2.0 g, an Ortofon 2M in the 1.5–2.0 g window.
The method is simple but unforgiving of guesswork: balance the arm to zero so it floats level, set the dial scale to zero, then dial in the manufacturer’s recommended force and confirm it with a digital stylus-force gauge reading to 0.01 g. The numbers printed on counterweights are notoriously optimistic — on my gauge they are routinely off by 0.2 g or more. The full procedure, including how to read your cartridge’s spec sheet, is in the tracking force adjustment guide.
Step Four: Dial In Anti-Skate
As the record spins, friction drags the stylus inward toward the spindle. Anti-skate is the counter-force that pulls the arm gently outward to balance that pull, keeping the stylus centered in the groove so it presses evenly on both walls. Set it wrong and you get one channel mistracking before the other, uneven wear, and a stylus that wants to slide across a silent record.
A sane starting point is to set anti-skate roughly equal to your tracking force — 1.8 g VTF, 1.8 on the anti-skate dial — then refine. I go into the blank-groove test and the by-ear method in the anti-skate setting guide. If your deck combines these two adjustments, my older combined walkthrough on setting tracking force and anti-skate step by step covers the quick version, but the dedicated guides go deeper on each.
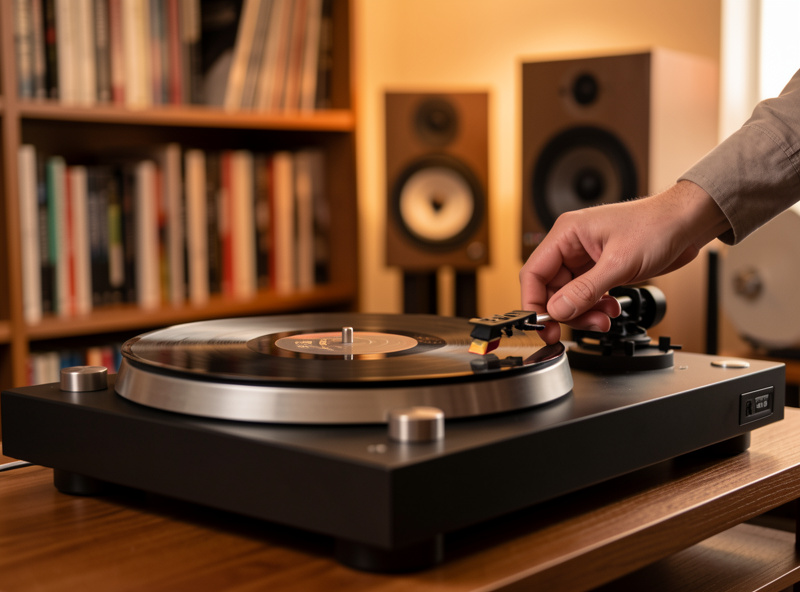
Step Five: Set Azimuth
Azimuth is the side-to-side tilt of the cartridge — whether the stylus sits perfectly vertical in the groove or leans left or right. When it is off, the two channels no longer read the groove walls symmetrically, channel separation collapses, and the stereo image smears. On a fixed headshell you may have nothing to adjust; on an arm with azimuth adjustment, it is worth getting right.
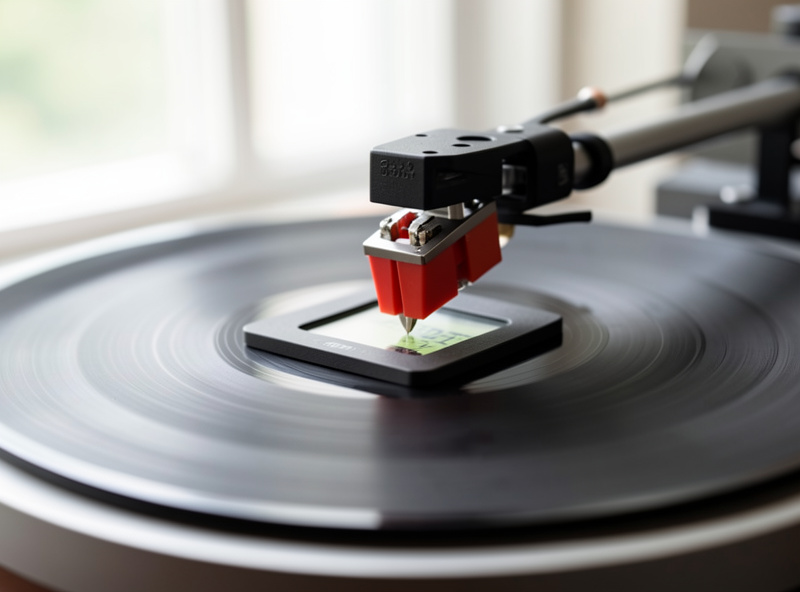
The quick check is a small mirror on the platter: the stylus and its reflection should form a straight vertical line. The precise method is measuring channel crosstalk and tuning for maximum separation — a properly set azimuth typically gets you into the 25–30 dB separation range. I walk through both in the azimuth adjustment guide. Azimuth interacts with cartridge quality, so it matters more as you move up to a better phono cartridge with finer stylus profiles.
Step Six: Tune VTA and SRA
Vertical tracking angle (VTA) is the height of the back of the tonearm, and stylus rake angle (SRA) is the related angle at which the stylus contacts the groove wall. The industry target for SRA is roughly 92 degrees, which you approximate by starting with the tonearm parallel to the record surface and adjusting from there. Raise the back of the arm and you increase VTA, shifting tonal balance brighter; lower it and things warm up.
VTA is the one adjustment I set by ear after locking everything else, because the audible window is narrow and record thickness changes it — a 200-gram pressing sits higher than a standard 120-gram disc. It is also the adjustment most prone to placebo, so I change it in small, repeatable steps and listen for sibilance and inner-groove clarity rather than chasing a feeling. The method, including how stylus profile changes how fussy VTA is, lives in the VTA and SRA adjustment guide.
Step Seven: Verify Speed Accuracy
Everything above is wasted if the platter spins at the wrong speed. Pitch and timing both ride on it: a platter running 1% fast raises pitch by roughly a sixth of a semitone, which trained ears catch on sustained piano or vocals. Belt-drive decks drift as belts age and stretch; direct-drive decks like the Technics class hold 33.33 and 45 rpm to a tighter tolerance, which is the real argument in the old belt drive vs direct drive debate.
You verify speed with a strobe disc under mains-frequency light, or far more conveniently with a smartphone app that reads platter RPM off a marker. Anything inside about 0.1–0.3% of nominal is good; consistent wow and flutter you can hear means a belt, bearing, or motor issue. The full testing method and how to interpret the numbers is in the speed accuracy check guide.
The Full Calibration Checklist
Here is the whole chain in one place — the adjustment, the tool that sets it, the target to aim for, and how often it actually drifts and needs a recheck. Print it or keep it open the next time you mount a cartridge.
| Adjustment | Tool | Target | Recheck When |
|---|---|---|---|
| Plinth / platter level | Bubble level | Centered both axes | After any move |
| Overhang / alignment | Two-point protractor | Stylus traces both nulls (66.0 / 120.9 mm) | New cartridge |
| Tracking force (VTF) | Digital stylus gauge | Cartridge spec, often 1.5–2.0 g | New stylus, seasonal |
| Anti-skate | Dial / weight | Roughly equal to VTF, then refine | With VTF change |
| Azimuth | Mirror or crosstalk meter | Stylus vertical, 25–30 dB separation | New cartridge |
| VTA / SRA | Arm-height adjuster | Arm parallel, ~92° SRA, then by ear | Thick / thin pressings |
| Speed | Strobe or RPM app | 33.33 / 45 rpm, within 0.1–0.3% | New belt, periodically |
Where the Money Actually Goes
Once the deck is calibrated, the upgrade question becomes rational instead of emotional. The order of return that has held up across every deck I have lived with is: clean your records first, because most pops are dust and a clean groove is free resolution — start with the record cleaning guide. Then nail setup, which this guide just walked through. Then upgrade the phono stage, because gain and loading shape the sound more than most people expect — the phono stage guide and the deeper cartridge loading explainer make the case. Only then does a new cartridge or a better tonearm pay off, which is where the turntable upgrade guide and tonearm guide come in.
The table itself is last, and it is the most over-weighted purchase in the hobby. A better plinth and platter mat buy you resonance control, not magic — I compare materials in the platter mat guide, and for the truly committed there is the CNC-routed DIY plinth project, which is exactly the kind of workshop crossover that makes wood hold its shape under a turning platter. Spend in that order and every krona does more work.
How Long Setup Actually Takes
A first full setup on an unfamiliar deck takes me about an hour, unhurried, with the gauge and protractor out. A recheck on a deck I know — confirm level, VTF, and speed — is ten minutes. The mistake is treating it as a one-time ritual. Stylus force creeps as suspensions settle, belts stretch, and a new pressing thickness nudges VTA. I do a quick gauge-and-strobe pass every few months and a full alignment whenever I change a cartridge or stylus. None of it is hard. It is just discipline, and discipline is the whole difference between a deck that sounds like the master and one that sounds like an apology.
Matching the Cartridge to Your Arm and Phono Stage
Calibration assumes the cartridge belongs on the arm in the first place, and that is a step beginners skip. A cartridge has a compliance — how springy its suspension is — and it needs to pair with the effective mass of your tonearm so their resonant frequency lands in the safe 8–12 Hz window. A high-compliance cartridge on a heavy arm, or a stiff low-compliance one on a light arm, drops that resonance into the range where warps and footfalls excite it, and no amount of anti-skate fixes that.
The other half of the match is electrical. A moving-magnet cartridge wants 47 kΩ loading and is sensitive to capacitance; a low-output moving-coil wants far lower impedance, often in the 100–1000 Ω range, and a phono stage with the gain to lift its tiny output. Get the loading wrong and a perfectly aligned cartridge still sounds rolled-off or shouty. I run both MM and MC carts across a phono stage with switchable gain and loading specifically so I can hear the difference, and it is not subtle. Before you obsess over VTA, make sure the cartridge and the chain it feeds were meant for each other — the cartridge loading explainer and the phono stage guide cover the electrical side in full.
The Alignment Bench: Tools Worth Owning
You do not need an expensive kit to calibrate a deck properly — you need three cheap tools that replace guesswork with numbers. A digital stylus-force gauge that reads to 0.01 grams is the one I reach for most; it pays for itself the first time it shows your counterweight scale is 0.2 grams off. A two-point protractor (Baerwald and Stevenson printed on the same card or, better, an acrylic mirrored gauge) sets overhang and offset. A small bubble level confirms the plinth. That is the whole bench for the essentials.
If you want to go further, a USB or smartphone speed app and a strobe disc cover speed verification, and a tiny inspection mirror handles a first-pass azimuth check. None of it is exotic. A solid digital stylus force gauge and a two-point alignment protractor together cost less than a single budget cartridge and will outlast every deck you mount them on. As an Amazon Associate I earn from qualifying purchases.
What I would not spend on early is a digital azimuth-and-crosstalk analyzer or a fancy test record you will use twice. Those are for the deep end of the hobby, and the mirror-and-ear method gets a hobbyist 95% of the way there. Buy the gauge, buy the protractor, and put the rest of the money into records and a better phono stage.
The Setup Mistakes I See Most Often
The same handful of errors show up on nearly every deck someone hands me to “fix.” The first is trusting the counterweight numbers instead of a gauge — that one is almost universal, and it is why so many people run their cartridge a quarter gram out of spec without knowing it. The second is forgetting anti-skate entirely, or leaving it at zero because the deck “sounded fine,” which it did until the right channel started mistracking on loud passages.
The third is over-thinking VTA. People read about it, decide it is the secret to great sound, and spend an evening tilting the arm a millimeter at a time while every other adjustment is still wrong. VTA is real, but it is the last and smallest adjustment, not the first. The fourth is skipping the level check, especially on a wall shelf that looks level but is not. And the fifth is never rechecking — setting a deck up once in 2019 and wondering why it sounds tired now, when the stylus has 1,500 hours on it and the belt has stretched. Calibration is maintenance, not a one-time ceremony.
Frequently Asked Questions
What order should I set up a turntable in?
Level the plinth, mount and align the cartridge with a protractor, set tracking force, then anti-skate, then azimuth, then VTA, and finally verify speed. Each step depends on the one before it, so working out of order forces you to redo adjustments that drift.
Do I really need a stylus force gauge and protractor?
Yes. The cardboard alignment card and printed counterweight numbers are routinely off by 0.2 grams or more on a digital gauge. A two-point protractor and a 0.01 gram stylus gauge cost little and are the difference between guessing and knowing your setup is in spec.
How often should I recalibrate my turntable?
Do a full alignment whenever you fit a new cartridge or stylus. Beyond that, a quick check of level, tracking force, and speed every few months catches drift from settling suspensions, stretched belts, and changing record thickness.
Does setup matter more than the turntable itself?
Up to a point, yes. A correctly calibrated mid-tier deck will out-resolve a carelessly set up expensive one. The honest order of return is cleaning, setup, phono stage, cartridge, then the table, which is the reverse of how most beginners spend.
Can a bad setup damage my records?
It can. Tracking force set too light lets the stylus skip and mistrack, which carves distortion permanently into the groove. Wrong anti-skate causes uneven groove-wall wear. Correct calibration protects your records as much as it improves the sound.
Is direct drive easier to keep in calibration than belt drive?
For speed, generally yes. Direct-drive decks hold 33.33 and 45 rpm to a tighter tolerance and do not have a belt to stretch. Belt drives need an occasional speed check and eventual belt replacement, but every other adjustment in this guide is identical for both.
Related Guides
Each adjustment in the calibration chain has its own deep dive: