Most surface noise on a record is not damage. It is dust sitting in the groove, and the single biggest upgrade most people can make to their sound is a cleaning routine they actually follow. A dry carbon-fiber pass before every side, a proper wet clean for anything new or thrifted, and an anti-static inner sleeve to keep it clean afterward will quiet a collection more than a cartridge swap ever will. This is the order I work in on my own bench, and it is the order this guide follows.
I run a Technics SL-1200-class direct drive alongside a rebuilt Rega P3 and a Pro-Ject belt deck, and the one thing every record that touches any of them goes through first is cleaning. I have learned the hard way that you cannot align your way out of a dirty groove. So before you spend on a better stylus, build the cleaning station. It is the cheapest, highest-return move in the hobby, and the rest of this guide breaks down every layer of it.
Why Record Cleaning Outranks Almost Every Upgrade
A clean groove lets the stylus read the modulation instead of fighting debris. Dust, mold-release compound on new pressings, and the static that pulls more dust onto the surface are the three things that make a record sound noisier than the pressing actually is. Remove them and the noise floor drops, the highs open up, and the stylus stops dragging contamination across the vinyl like sandpaper.
Here is the part beginners skip: a dirty record physically wears your stylus and your records faster. Grit in the groove acts as an abrasive every time the diamond passes over it, so cleaning is not just sonic, it is preservation. The cheap habits below protect a collection worth far more than the gear that plays it. That is why on my bench the spending order is cleaning first, then setup, then phono stage, then cartridge, then the table itself.
The flip side: not every pop is dirt. Some are pressing defects molded permanently into the vinyl, and no cleaning removes those. Learning to tell a removable contaminant from a baked-in defect saves you from scrubbing a record that was never going to be quiet. I cover that distinction throughout, because chasing a non-removable click with ever-harsher cleaning is how people damage good records.
The Three Levels of Record Cleaning
Record cleaning is not one task. It is three, and matching the right one to the record in your hand is the whole skill. Dry maintenance happens every play and takes ten seconds. Wet cleaning is a deeper reset for new or dirty records and takes a few minutes. Deep cleaning, by machine or ultrasonic, is the heavy artillery for thrift finds, mold, and stubborn grime. Use the lightest method that does the job, because every cleaning step also carries a small risk of pushing debris around if done carelessly.
The mistake I see most is people treating all three as interchangeable: wet-cleaning a record they should have just brushed, or brushing a moldy thrift find that needed a full wash. Below is how I decide, and each method gets its own deep-dive linked from this hub.
Dry Maintenance Cleaning
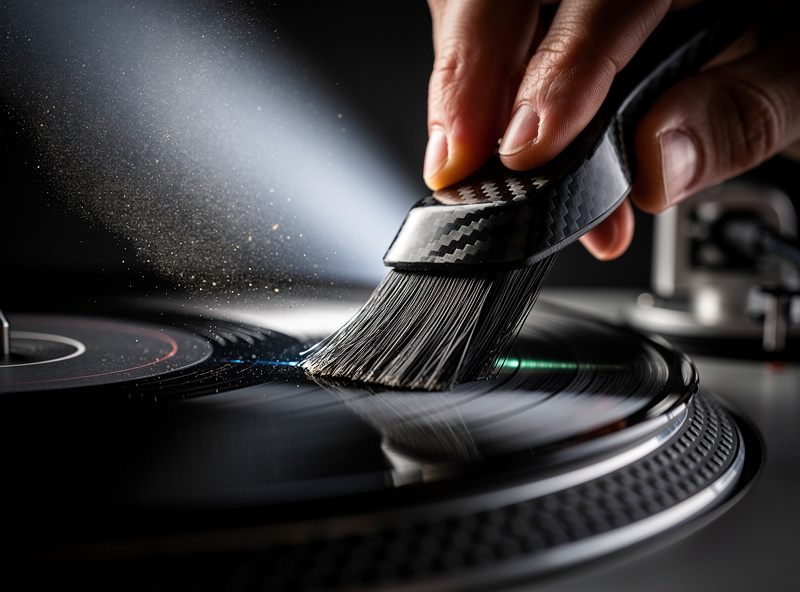
Before every side, a carbon-fiber brush held lightly against the spinning record lifts loose surface dust and bleeds off some static. This is the habit that keeps a clean record clean. It does nothing for embedded grime, so it is maintenance, not restoration. I keep a brush on the plinth of every deck so there is no excuse to skip it. My record cleaning brushes guide compares carbon-fiber, velvet, and anti-static types and where each actually belongs.
Wet Cleaning
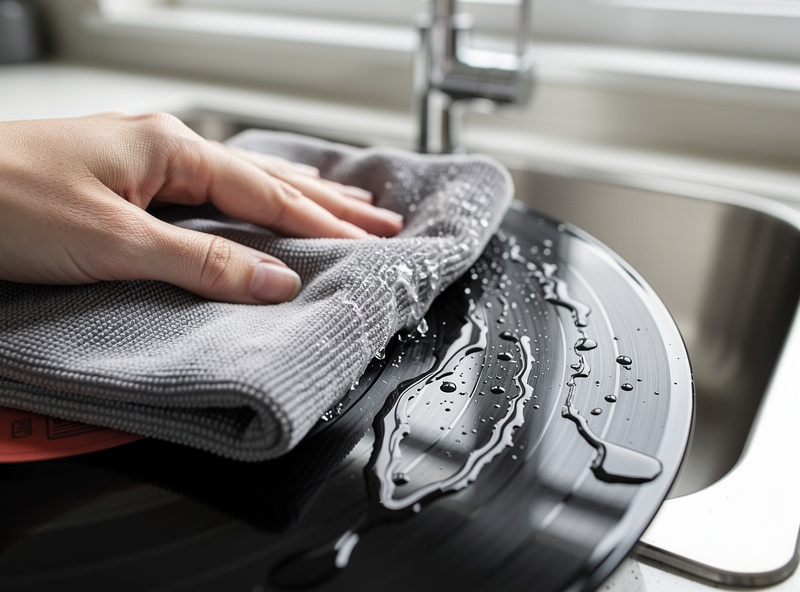
When a record is visibly dusty, fingerprinted, or new out of the shrink, dry brushing is not enough. A proper wet clean uses a record-safe fluid and a clean applicator to dissolve and lift contaminants the brush leaves behind, followed by a careful dry. This is the single most transformative step for most collections, and it is where the step-by-step technique in my how to clean vinyl records walkthrough earns its keep. My wet cleaning method covers the fluid, the applicator, and the dry in detail.
Deep and Machine Cleaning
For records that are genuinely filthy, moldy, or full of decades of grime, manual wet cleaning struggles. This is the domain of vacuum record-cleaning machines and ultrasonic cleaning, which reach into the groove in ways a hand cannot. If you are weighing which machine, my roundup of the best record cleaners compares manual, vacuum, and ultrasonic by what they actually do for the money, and my deep-dive on ultrasonic record cleaning covers whether the tank is worth it.
Cleaning Methods Compared
Here is how the methods stack up by effort, cost, and what they are actually good for. I have run all of these on the same dirty thrift records to see where each one earns its place. Use this as the decision table: match the record’s condition to the lightest method in the right-hand columns.
| Method | Best For | Effort | Typical Cost | Deep-Clean Power |
|---|---|---|---|---|
| Carbon-fiber brush | Every-play maintenance, loose dust | 10 seconds | Low | Low |
| Manual wet clean | New records, fingerprints, light grime | 2-4 minutes | Low | Medium |
| Vacuum RCM | Larger collections, repeatable results | 1-2 minutes | Medium-High | High |
| Ultrasonic | Thrift finds, mold, deep groove grime | Batch, hands-off | High | Very high |
| Used-record method | Garage-sale and second-hand vinyl | 5-10 minutes | Low-Medium | High |
Building a Cleaning Station That Costs Less Than a Cartridge
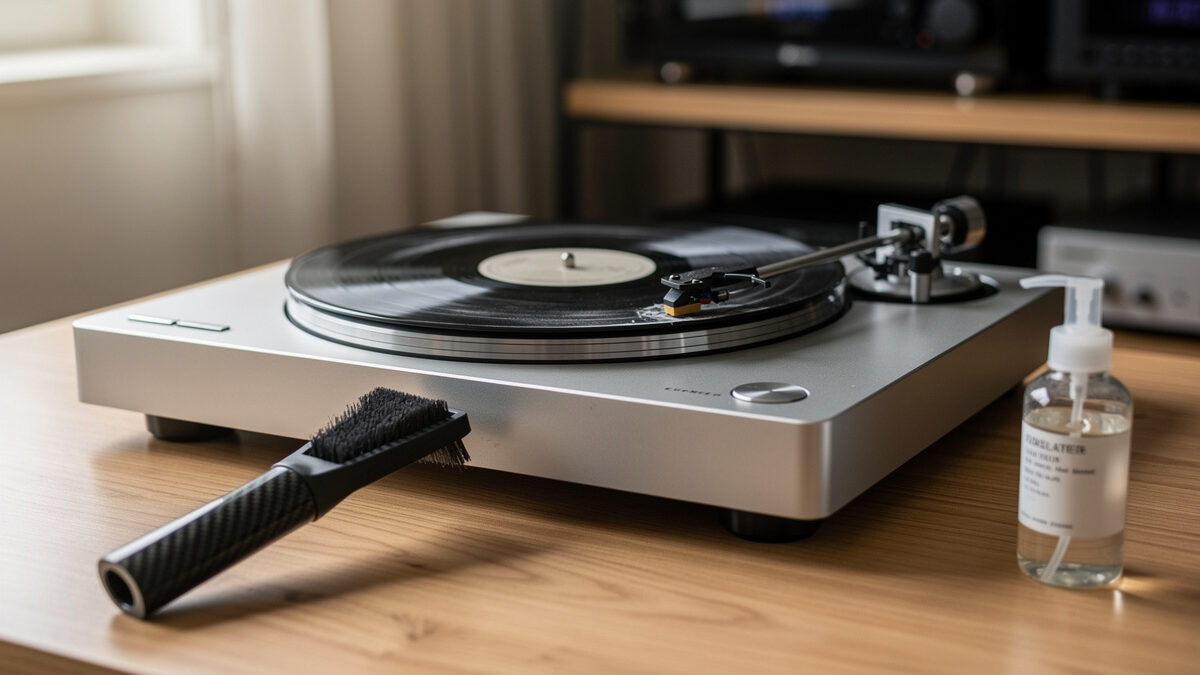
You do not need a four-figure machine to clean records well. A complete manual station that handles the vast majority of records costs about the same as a budget cartridge, and it is the better first purchase. Here is what actually lives on my bench and earns its keep. Each piece does one job, and together they cover everything short of restoring filthy thrift finds.
The core kit is a carbon-fiber brush for every-play dust, a bottle of record-safe cleaning fluid, a lint-free or microfiber applicator pad, a stack of distilled water for rinsing and dilution, and a microfiber cloth or drying rack so records dry without re-contaminating. Add a roll of anti-static inner sleeves and you have closed the loop from cleaning to storage. That is the whole station, and it fits in a shoebox.
People assume the expensive vacuum and ultrasonic machines are the starting point. They are not. They are what you add once you have a large collection or a steady stream of dirty used records and the manual method becomes a time bottleneck. Start manual, learn what clean sounds like, and upgrade to a machine only when volume justifies it. The decision between machines is exactly what my best record cleaners roundup is for.
Cleaning Fluids and Why Distilled Water Matters
What you put on a record matters as much as how you wipe it. Tap water carries dissolved minerals that dry into a fine residue inside the groove, which is the opposite of what you want. Distilled or deionized water leaves nothing behind, which is why every fluid I mix or buy starts from distilled water rather than from the tap. This is one of the cheapest upgrades to your cleaning results and the most overlooked.
A purpose-made record cleaning fluid combines that pure water base with a small amount of surfactant to break the surface tension and lift oils, and often a touch of alcohol to speed drying on the right pressings. I avoid harsh solvents and anything not labeled record-safe, because the goal is to lift contaminants without attacking the vinyl or the label. A clean applicator matters too: a pad that has dried with grime in it just reapplies that grime, so I keep applicators clean and replace them when they stop coming clean.
One caution worth stating plainly: never use household cleaners, dish soap with additives, or isopropyl alcohol straight on shellac 78s, which alcohol can destroy. For standard vinyl LPs the record-safe fluids are formulated to be gentle, and that is what I stick to. When in doubt, less aggressive is always the safer call, because you can repeat a gentle clean but you cannot undo damage from a harsh one.
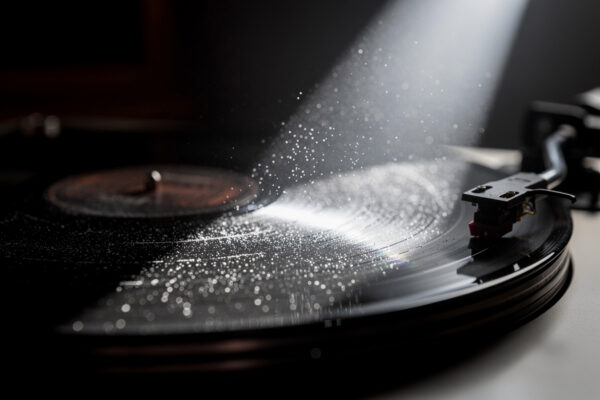
Static Is the Other Half of the Problem
You can clean a record perfectly and have it pull a fresh coat of dust out of the air within a minute, because vinyl builds a static charge as the stylus tracks it and as you slide it out of a sleeve. Static is why a record that looked clean crackles, and why dust seems to reappear instantly. Treating cleaning without treating static is half a job.
On my bench, static control means a carbon-fiber brush (which bleeds some charge to your hand), anti-static inner sleeves, and in dry winter air an anti-static device for the worst cases. My guide on how to stop static on vinyl records breaks down what actually works versus marketing. The short version: humidity and good sleeves do most of the work, and you rarely need the expensive gadgets.
Sleeves: Where Cleaning Becomes Storage
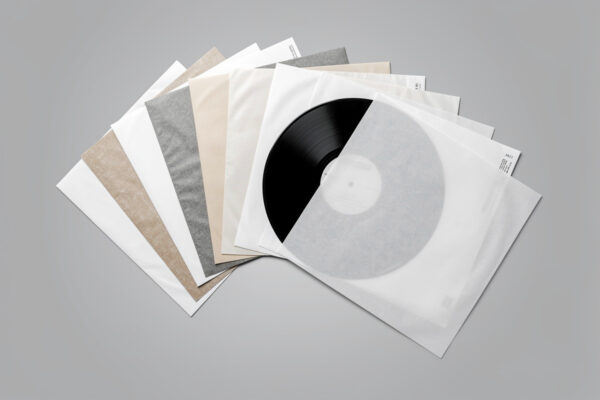
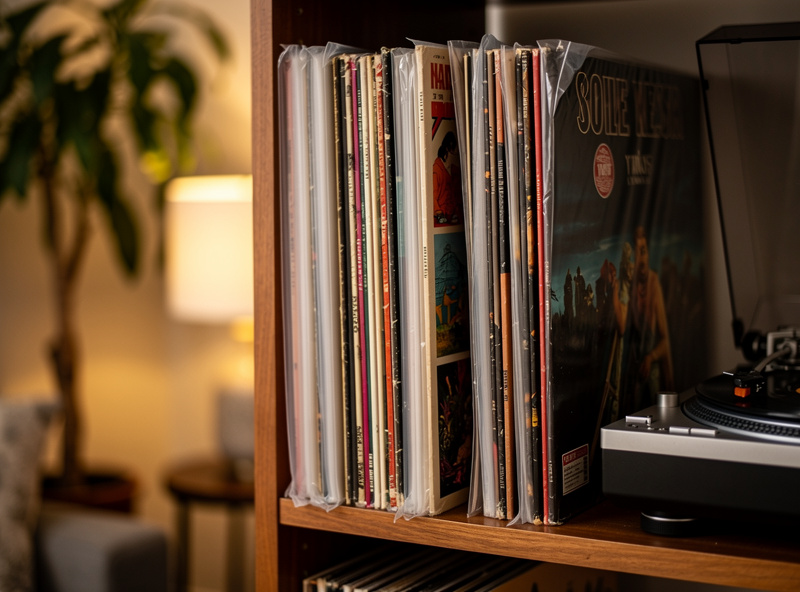
The fastest way to undo a good clean is to slide the record back into the paper sleeve it came in. Stock paper inner sleeves shed fibers and abrade the surface, and they let static build. Swapping every record into an anti-static, soft-lined inner sleeve is the step that keeps your cleaning work intact between plays. I do it to every incoming record before it ever gets filed.
Inner sleeves protect the playing surface; outer sleeves protect the jacket and its value. The differences between rice paper, HDPE, and poly-lined inners, plus when outer sleeves are worth it, get their own deep-dive in my record inner and outer sleeves buyer guide. Once the records are sleeved, how you shelve them matters too, which is the subject of my record storage guide: vertical, supported, out of heat and sun.
Cleaning Used and Second-Hand Records
Used records are where cleaning pays off the most and where it matters most that you do it right. A crate-dug record can carry years of dust, smoke residue, old fingerprints, and sometimes mold, and playing it dirty grinds that contamination into the groove and onto your stylus. I clean every second-hand record before it ever sees a platter, with no exceptions.
Mold in particular needs care: it should be lifted out with fluid, not dry-brushed deeper into the groove. The full process for thrift finds, including the mold protocol and when a record is too far gone, lives in my guide on how to clean used records. This is also where deep cleaning earns its cost, because a thrift record that cleans up to near-silent is the best value in the hobby.
Handling and Environment: Cleaning You Do by Not Dirtying
The cleanest record is the one that never gets dirty, and a surprising amount of cleaning is avoided simply by handling records correctly. I hold every record by the edges and the label only, never touching the playing surface, because skin oils are exactly the kind of contaminant that attracts and binds dust. That one habit cuts down how often a record needs a wet clean at all.
Environment matters just as much. Records stored in heat warp, and warping is a problem no cleaning fixes, so the same shelving discipline that protects against dust protects against heat and sun. Moderate humidity also helps, because very dry air worsens static and pulls more dust onto the surface. Keeping records vertical, supported so they do not lean and warp, and away from radiators and windows is the passive half of record care that makes the active cleaning far less frequent. My storage guide goes deep on the shelving and environment side, and the broader record care guide connects it all.
My Order of Operations for Any New Record
Every record that enters my listening space follows the same path, and it takes about five minutes. New or used, the sequence does not change: inspect under raking light to spot defects versus dirt, wet-clean (or deep-clean if it is bad), dry fully, brush off any last dust, slide into a fresh anti-static inner sleeve, then file it. Only after all of that does it get a first play.
The reason for the fixed order is that each step assumes the previous one happened. A great inner sleeve is wasted on a dirty record; a perfect wet clean is wasted if you re-sleeve into shedding paper. Build the habit once and it becomes automatic. The records you clean today are the ones that still sound clean in twenty years, which is the entire point of caring for vinyl as a long-term format. For the broader picture beyond cleaning, my vinyl record care guide ties cleaning together with handling and environment.
Cleaning Mistakes That Quietly Damage Records
Most record damage I see from cleaning is self-inflicted and avoidable. The intent is good but the method is wrong, and a record that would have been fine ends up scuffed, hazed, or full of fibers. These are the ones I watch for, because every one of them is easy to do without realizing.
Dry-wiping a dusty record is the worst habit: dragging a cloth across embedded dust grinds it into the groove like grit on sandpaper. If a record is dirty enough to need wiping, it needs to be wet. Wiping across the grooves rather than following them in a circular motion is the second mistake, because cross-groove wiping pushes debris into the walls. Always work with the groove, not across it. Using paper towels or tissues that shed fibers and leave a fine scratch haze is the third. And re-sleeving a freshly cleaned record into the shedding paper inner it came in undoes the whole effort, which is why sleeve swaps are part of cleaning, not a separate task.
The subtler mistake is over-cleaning. Once a record is clean, repeated aggressive cleaning in pursuit of a click that is actually a pressing defect just adds wear and risk for no benefit. Learn the raking-light inspection to separate removable dirt from permanent defects, clean what is dirty, and leave the rest alone. Restraint is a skill, and it is the one that keeps a collection in good shape for decades.
Clean Records Deserve a Clean Setup
Cleaning is the first link in the chain, but a clean record still needs a correctly set-up deck to sound its best. A mistracking stylus drags through the groove and redistributes whatever is left, so the cleaning effort and the setup work reinforce each other. If you are dialing in the deck, start with tracking force and anti-skate and proper cartridge alignment, because a misaligned cartridge will make even a spotless record sound rough.
The platter mat under the record also plays into cleanliness and static. Some materials attract and hold dust more than others, which is part of why I compare them in my turntable mat guide. And if you are still choosing a deck, the record player guide and the belt drive versus direct drive breakdown cover where to put your money first. The recurring theme across all of it: spend on cleaning and setup before you spend on the table.
Frequently Asked Questions
How often should I clean my vinyl records?
Dry-brush with a carbon-fiber brush before every play, wet-clean any new or dirty record before its first spin, and deep-clean used or thrift records once when they arrive. A clean record kept in an anti-static sleeve rarely needs more than the routine dry pass.
Can I clean a record with just water?
Plain water lifts loose dust but leaves behind oils, mold-release compound, and fingerprints. A record-safe cleaning fluid dissolves contaminants water cannot, and distilled water is better than tap because tap minerals can leave residue in the groove.
Does cleaning remove pops and clicks?
Cleaning removes pops caused by dust and grime, which is most of them. It cannot remove pops molded into the vinyl as pressing defects or caused by groove damage. Inspect under raking light: removable debris looks like dust, while defects are permanent marks.
Is ultrasonic cleaning worth it?
For large collections or lots of dirty used records, ultrasonic cleaning reaches groove contamination manual methods miss and runs hands-off in batches. For a small collection of mostly clean records, a brush and manual wet clean cover the need at a fraction of the cost.
Why does my record get dusty again right after cleaning?
Static. Vinyl builds a charge that pulls dust from the air, so a freshly cleaned record can look dusty within minutes. Use anti-static inner sleeves, a carbon-fiber brush, and in dry air an anti-static device to keep the charge and the dust away.
Should I clean brand-new records?
Yes. New records carry mold-release compound and static from manufacturing and packaging, which adds surface noise. A single wet clean before the first play removes it and noticeably lowers the noise floor on most new pressings.