What Is Tracking Force?
Tracking force is the downward pressure, measured in grams, that the stylus exerts on the record groove. It must be set precisely within the cartridge manufacturer’s recommended range—typically 1.5 to 2.5 grams for modern moving magnet cartridges. Too little force causes the stylus to mistrack, skipping or distorting on loud passages. Too much force accelerates wear on both the stylus and the record groove.
Every cartridge ships with a recommended tracking force range printed on the box and in the manual. This range reflects the cantilever suspension’s designed compliance and the stylus profile’s contact characteristics. Setting tracking force is the single most important calibration step after installing a new cartridge, and it must be rechecked whenever you change the mat, platter, or move the turntable.
What Is Anti-Skate?
Anti-skate is a mechanism that applies a small outward force to the tonearm, counteracting the inward skating force created by the tonearm’s offset headshell angle. Without anti-skate, the stylus presses harder against the inner groove wall than the outer groove wall, causing uneven wear and distorted stereo imaging with louder output from one channel.
Skating force varies across the record surface—it is strongest at the outer grooves and weakest at the inner grooves. Most anti-skate mechanisms apply a constant force that approximates the average skating force across the record. Some high-end tonearms use dynamic anti-skate systems that vary the force as the arm tracks inward, but these are rare and expensive.
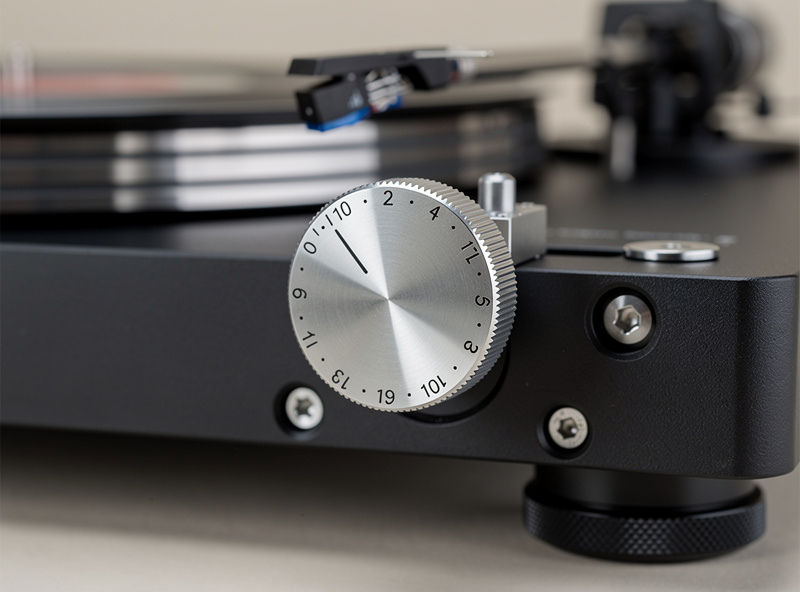
Anti-skate is set using either a dial, a hanging weight on a thread, or a magnetic system. The most common method on consumer turntables is a graduated dial that you match to the tracking force value. Setting anti-skate is quick, critical, and often overlooked by new vinyl listeners.
Tools You Need
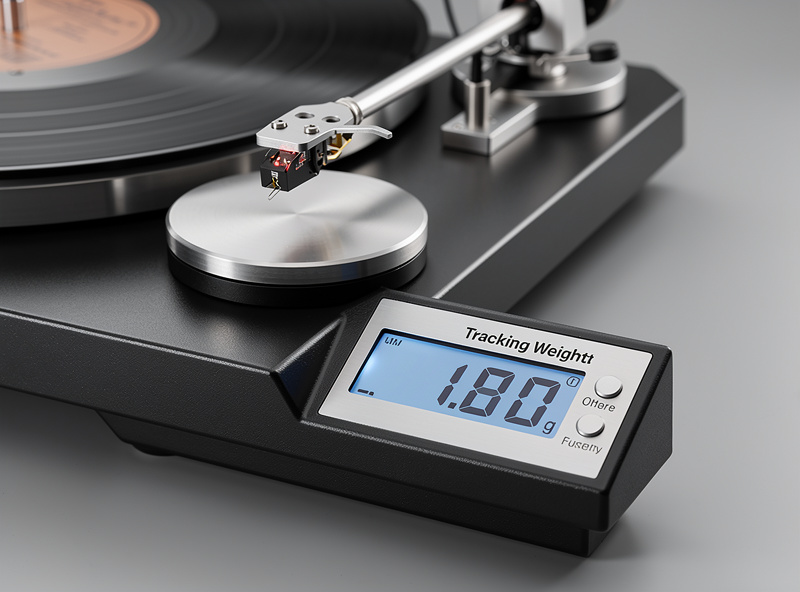
A digital stylus force gauge is the most accurate tool for setting tracking force. Analog gauges that balance the arm on a spring are less precise and can be off by 0.2–0.3 grams. A digital gauge costs $15–$25 and reads to 0.01 grams, giving you confidence that the tracking force is exactly correct.
You also need a headshell wrench or small screwdriver if the cartridge mounting bolts need loosening, and a two-point protractor if you are doing a full cartridge setup. For tracking force and anti-skate adjustment only, the digital gauge and the tonearm’s built-in counterweight and anti-skate dial are sufficient.
The Shure SFG-2 ($20) and the Neoteck digital gauge ($15) are the most popular budget options. Both use a small platform that the stylus rests on, with a digital readout in grams. Place the gauge on the platter at the same height as the record surface to avoid parallax error from the tonearm’s pivot geometry.
Step-by-Step: Setting Tracking Force
Setting tracking force requires balancing the tonearm, zeroing the counterweight dial, and rotating the counterweight to the recommended force. The entire process takes 5 minutes with a digital gauge.
Step 1: Remove the stylus guard. If your cartridge has a detachable stylus guard, remove it so the stylus can contact the gauge platform. Set the anti-skate dial to zero to prevent the arm from skating off the gauge during measurement.
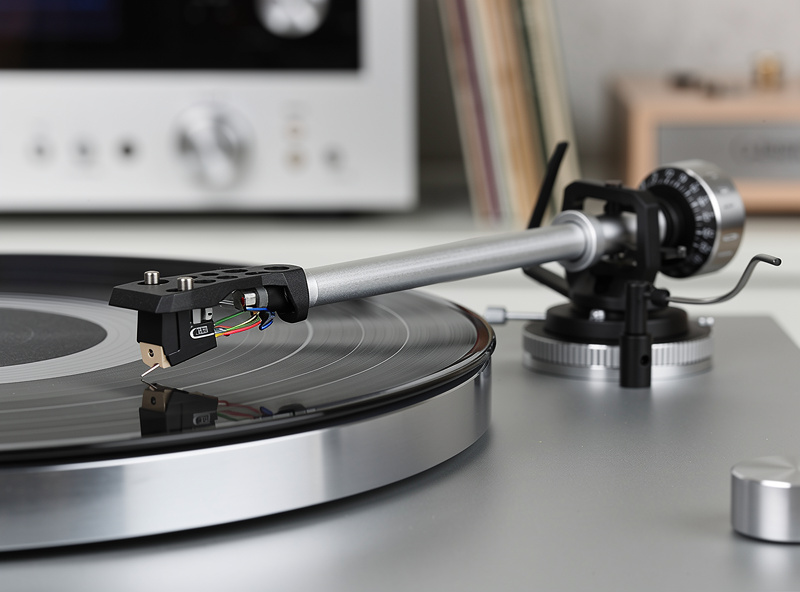
Step 2: Balance the tonearm. Slide the counterweight toward the back of the arm until the tonearm floats horizontally in mid-air, neither dropping toward the platter nor rising toward the arm rest. This is the zero-balance point—the arm is experiencing zero downward force at the stylus.
Step 3: Zero the dial. Hold the counterweight steady with one hand. Rotate only the graduated dial ring (not the counterweight itself) until it reads zero. This aligns the dial with the zero-balance position you found in Step 2.
Step 4: Rotate the counterweight to the recommended force. Now rotate the entire counterweight (both the weight and the dial together) forward toward the platter until the dial reads the cartridge manufacturer’s recommended tracking force. For example, if the recommended force is 1.8 grams, rotate until the dial reads 1.8.
Step 5: Verify with the digital gauge. Place the digital gauge on the platter, power it on, and gently lower the stylus onto the gauge platform. The gauge should read within 0.05 grams of your target. If it reads 1.75 when you targeted 1.8, rotate the counterweight slightly forward and recheck. If your tonearm lacks a graduated dial, skip Steps 2–4 and use only the digital gauge to set the force directly.
Step-by-Step: Setting Anti-Skate
Anti-skate should be set after tracking force is confirmed. The standard method is to match the anti-skate dial to the tracking force value.
Method 1: Dial Matching. Set the anti-skate dial to the same number as the tracking force. If tracking force is 2.0 grams, set anti-skate to 2.0. This is the method recommended by most cartridge manufacturers and works well for most listeners.
Method 2: Blank Record Test. Place a blank (un-grooved) record or a smooth-sided CD on the platter. Lower the stylus onto the surface. If the arm skates inward, increase anti-skate. If the arm drifts outward, decrease anti-skate. When the arm stays roughly in one position, the anti-skate matches the skating force. This method is more precise than dial matching but requires a blank disc.
Method 3: Multiband Test Record. Play a test record with dedicated anti-skate tracks. These tracks contain constant-amplitude signals that reveal imbalance between the left and right channels. Adjust anti-skate until both channels produce equal volume. This is the most accurate method but requires a specialized test record.
For most listeners, Method 1 is sufficient. Use Method 2 or 3 if you hear channel imbalance or notice uneven record wear after months of playback. Anti-skate does not need to be perfect—an approximation within 0.3 grams of the ideal value is inaudible to most listeners.
Tracking Force Ranges by Cartridge Type
| Cartridge Type | Typical Range | Most Common Setting | What Happens Below Range | What Happens Above Range |
|---|---|---|---|---|
| MM (elliptical) | 1.5–2.5 g | 1.8–2.0 g | Mistracking, distortion on loud passages | Accelerated record and stylus wear |
| MM (microline) | 1.8–2.2 g | 2.0 g | Loss of high-frequency detail | Excessive groove wear |
| MC (elliptical) | 1.8–2.5 g | 2.0–2.2 g | Sibilance, poor tracking | Dulled dynamics, faster wear |
| MC (Shibata/line) | 2.0–2.5 g | 2.2 g | Distortion on complex passages | Accelerated wear |
| DJ (conical) | 2.5–4.0 g | 3.0 g | Skipping during backcueing | Heavy groove wear |
Always prioritize the cartridge manufacturer’s specific recommendation over these general ranges. The recommended range accounts for the specific cantilever suspension and stylus geometry of your cartridge.
Common Mistakes
The most common mistake is trusting the counterweight dial without verifying. Counterweight dials rely on the user correctly finding the zero-balance point and zeroing the dial. A slight error in Step 2 or Step 3 compounds into a tracking force error of 0.2–0.5 grams, which is enough to cause mistracking or accelerated wear. Always verify with a digital gauge.
The second mistake is setting anti-skate to zero because it seems unimportant. Without anti-skate, the stylus exerts more pressure on the inner groove wall, causing asymmetric wear that degrades stereo imaging over time. The damage accumulates slowly—after 100 plays without anti-skate, measurable channel imbalance can appear on your most-played records.
The third mistake is not rechecking tracking force after changing the mat or platter. Different mat thicknesses change the record height, which slightly alters the tonearm geometry and tracking force. A 2mm mat change can shift tracking force by 0.05–0.1 grams. Always recheck after any physical change to the turntable.
How Often to Recheck
Check tracking force whenever you change a component: new cartridge, new mat, new platter, or after moving the turntable. For routine use with no changes, recheck every 3–6 months. Counterweights can shift slightly over time due to vibration, and anti-skate mechanisms can lose calibration.
If you notice new distortion, sibilance, or channel imbalance on records that previously played clean, tracking force or anti-skate drift is the first thing to check. It takes 2 minutes with a digital gauge and solves the majority of playback quality issues that develop during normal use.
For cartridge alignment after tracking force is set, see Cartridge Alignment Guide. For full turntable setup guidance, see Turntable Buying Guide.
Frequently Asked Questions
What happens if tracking force is too low?
The stylus mistracks on loud or complex passages, producing distortion, sibilance, or skipping. The diamond cannot stay in the groove when the modulations exceed the available downward force. Most cartridges need at least 1.5 grams to track properly.
What happens if tracking force is too high?
Excessive tracking force accelerates wear on both the stylus diamond and the record groove. A stylus at 3.0 grams on a cartridge rated for 1.5–2.5 grams will wear records noticeably faster and can flatten the cantilever suspension over time.
Do I need a digital tracking force gauge?
Yes. Analog gauges and counterweight dials are typically accurate to only 0.2–0.3 grams. A $15 digital gauge reads to 0.01 grams, ensuring your tracking force is exactly correct and preventing both mistracking and premature wear.
Should anti-skate match tracking force exactly?
Ideally yes, but within 0.3 grams is inaudible to most listeners. Set the anti-skate dial to the same number as tracking force. If you hear channel imbalance, fine-tune using a blank record test or a multiband test record.
Do I need to readjust tracking force after changing the mat?
Yes. A different mat thickness changes the record height, slightly altering tonearm geometry and tracking force. Always recheck with a digital gauge after any physical change to the turntable, including mat, platter, or location moves.
Can I set tracking force without a gauge?
You can balance the tonearm and use the counterweight dial, but the accuracy is limited to 0.2–0.3 grams. For cartridges with microline or Shibata styli that require precise force, a digital gauge is mandatory. Budget $15 for a gauge—it prevents hundreds of dollars in record wear.
Related Articles
- Cartridge Alignment Guide: Get the Best Sound from Your Turntable
- Turntable Tonearm Guide: Types, Counterweights, and Upgrades
- Best Phono Cartridges 2026: Moving Magnet vs Moving Coil
- Turntable Upgrade Guide: Cartridges, Platters, Mats, and Tonearms
- Turntable Buying Guide 2026: How to Choose Your First Record Player