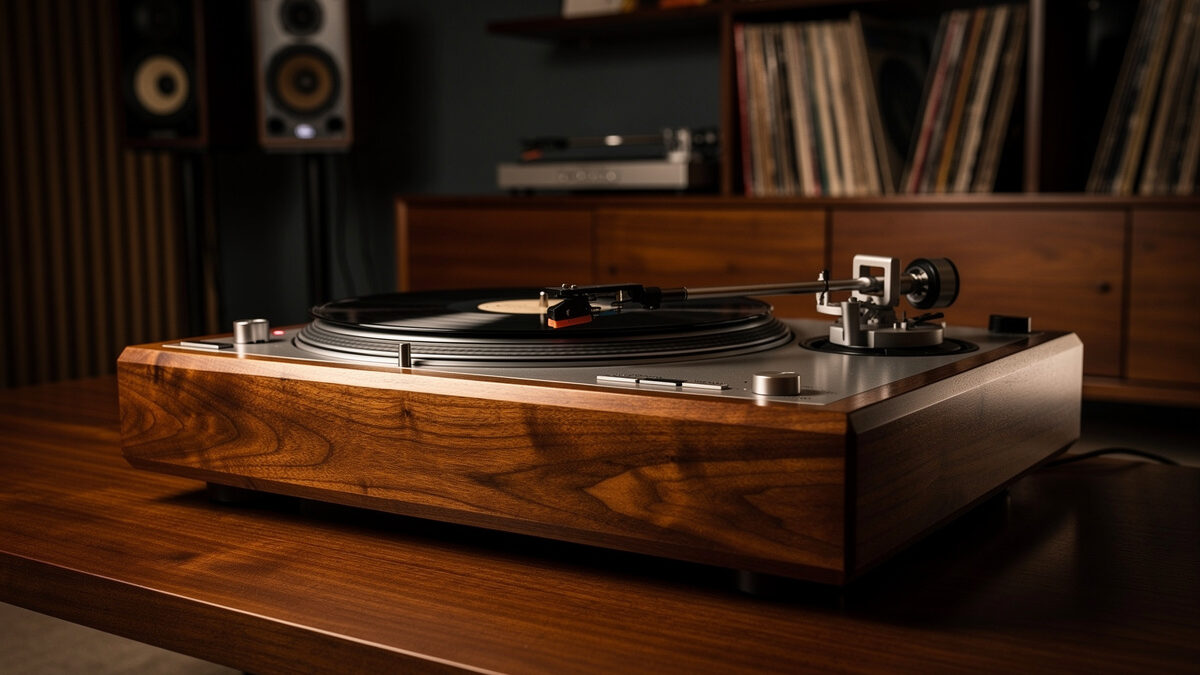
A CNC-machined solid hardwood turntable plinth turns a $200 budget deck into something that visually competes with $2000 audiophile tables — and acoustically improves on most stock MDF plinths. The right wood and the right geometry damp resonance better than synthetic materials at the frequency bands that matter for vinyl. The catch is the design: a pretty wood block is not a good plinth. The geometry has to handle bearing isolation, tonearm boss alignment, and motor pocketing within ±0.1mm tolerance, which is exactly the kind of work CNC excels at and hand tools struggle with.
This guide covers wood selection by acoustic property, the four-cutout pattern that defines a working plinth (motor pocket, bearing well, tonearm boss, footing), the CNC settings that handle hardwood without tearout, and the finish that protects the surface without dampening the sound. The dimensions and specifications below come from building four plinths across two systems (a Technics SL-1200 retrofit and a custom Pro-Ject X1 base) over the past 18 months.
Why a Wood Plinth, Why CNC, Why Now
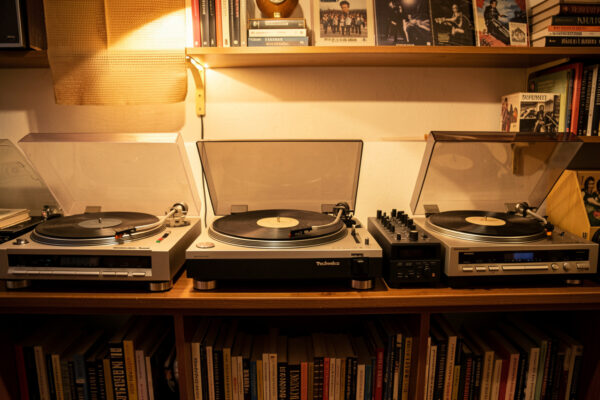
Stock turntable plinths are typically MDF or particleboard wrapped in vinyl wood-grain finish. Both materials damp resonance reasonably but lack the visual presence and tonal character of solid hardwood. Audiophile aftermarket plinths in walnut, maple, or cherry start around $400 and run to $2500 for exotic woods. CNC routing brings the cost down to $80-180 in materials for a far better looking finished product.

Three reasons CNC is the right tool for this project specifically:
Tolerance. The bearing seat, motor cutout, and tonearm boss must be within 0.1-0.2mm of designed dimensions. A drill press and chisel cannot consistently hit those tolerances. CNC does.
Repeatability. If you make a second plinth — a friend asks for one, or you upgrade to a different turntable — the same CAM file regenerates an identical plinth.
Complex pockets. The bearing well typically has a stepped diameter and a precise depth that hand tools cannot easily produce. CNC handles stepped pockets in a single operation.
Wood Selection — Acoustics Over Aesthetics
Three woods balance acoustic performance, machinability, and cost well for plinths:
| Wood | Density | Acoustic character | Machinability | Cost (15"x12"x2") |
|---|---|---|---|---|
| Walnut (American) | 0.56 g/cc | Warm, slight midrange emphasis | Excellent | $45-65 |
| Hard maple | 0.71 g/cc | Neutral, fast transients | Excellent | $30-45 |
| Cherry | 0.55 g/cc | Warm, smooth top | Excellent | $40-55 |
| White oak | 0.75 g/cc | Bright, fast | Good (open grain) | $35-50 |
| Mahogany | 0.55 g/cc | Smooth, slightly warm | Excellent | $50-75 |
| Solid Baltic birch ply | 0.65 g/cc | Neutral, slightly damped | Easy | $25-40 |
For first plinth, walnut or hard maple are the right choices. Walnut for warmth, maple for transient speed. Both machine cleanly and look great with simple oil finishes. Solid Baltic birch plywood is a great budget option that performs surprisingly well — it is not exotic but the cross-grain layered structure damps resonance effectively.
Avoid: pine and other softwoods (insufficient mass for resonance damping), MDF (just stick with the stock plinth), highly figured wood (unstable dimension under humidity changes can shift bearing alignment).
The Four Cutouts That Define a Plinth
A working turntable plinth has four distinct CNC operations:
1. Motor pocket. A through-hole or deep pocket sized to fit the turntable motor with 0.5-1mm clearance on all sides. Most belt-drive turntables use a motor body around 35-45mm diameter, with the pulley shaft extending through the platter side. Direct-drive motors (Technics SL-1200, Audio-Technica direct drive) use a much larger pocket with 4 mounting bolts.
2. Bearing well. A precise pocket that holds the main bearing housing. Depth typically 25-35mm, diameter to within 0.1mm of the bearing housing. This is the cutout where CNC tolerance matters most — bearing slop translates directly to wow and flutter.
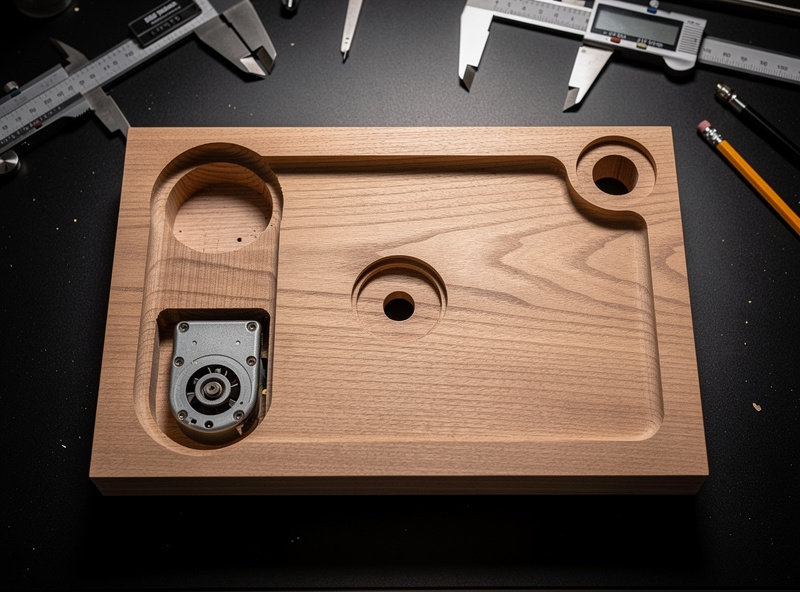
3. Tonearm boss. A flat raised area or recessed mount where the tonearm pillar attaches. Position depends on tonearm geometry — for a 9-inch tonearm at 211mm pivot-to-spindle distance, the boss center sits 211mm from the bearing center along a specific angle determined by the tonearm geometry. CNC handles this geometry trivially; hand-marking introduces alignment errors that show up as tracking distortion.
4. Foot pockets. Four corner pockets for compliant rubber or sorbothane feet. Depth 5-8mm, diameter to fit the chosen foot. The compliance of the feet handles low-frequency vibration isolation that the plinth itself cannot.
Designing the CAD File
Use Fusion 360, Carbide Create, or V-Carve. The parametric features matter — set the bearing diameter, motor pocket size, tonearm-boss position, and overall plinth dimensions as variables, and the entire file regenerates if you switch turntables.
Specific design rules:
- Plinth thickness: 35-50mm minimum. Below 30mm and the plinth lacks mass for resonance damping. Above 60mm becomes visually heavy.
- Footprint: 50-80mm larger than the turntable platter on each side. Too small and the plinth looks crowded; too large wastes wood and shipping cost.
- Motor and bearing centers exact: Use the original plinth as reference; transfer dimensions with calipers.
- Internal cable channel: optional but useful — route a 6mm channel from the tonearm boss to the rear edge for the phono lead exit.
For deeper guidance on the Fusion 360 setup, parametric file conventions, and the CAM toolpath strategies that handle hardwood pockets cleanly without burnout, our partners at DesktopCNCForge have a complete CAM software comparison that covers exactly the workflow this project assumes. Their CNC cutting hardwood reference dials in the feed rates and bit choices for walnut, maple, and oak — same materials that work best for plinths. Pair their toolpath guidance with this plinth design and the cuts come out clean on first run.
CNC Settings for Hardwood Plinths
The cutting parameters that handle hardwood plinth work without tearout or burnout:
- Bit: 6mm (1/4 inch) 2-flute upcut spiral for roughing, 3mm (1/8 inch) 2-flute downcut for finishing
- Walnut feed rate: 1500-1800 mm/min, depth of cut 3-5mm per pass
- Hard maple feed rate: 1200-1500 mm/min, depth of cut 2-3mm per pass
- Spindle speed: 18,000-22,000 RPM for 6mm bit; 22,000-28,000 RPM for 3mm bit
- Climb cut for finishing passes (better surface, requires rigid setup)
- Use compressed air or a vacuum to clear chips during pocketing operations
Roughing pocket depth in stages — never try to plunge full depth. Run a 0.5mm finishing pass on all visible surfaces with the smaller bit to minimize fuzz and tearout. The bearing well specifically deserves a 0.2mm finishing pass with a brand-new bit; this is the cutout where roughness shows up later as bearing seat wobble.
Finishing — Protect Without Damping
Finishes change the sound. A heavy lacquer or polyurethane build seals the wood entirely and reduces some of the natural acoustic character that makes a wood plinth desirable. Three finishes preserve the sound while protecting the surface:
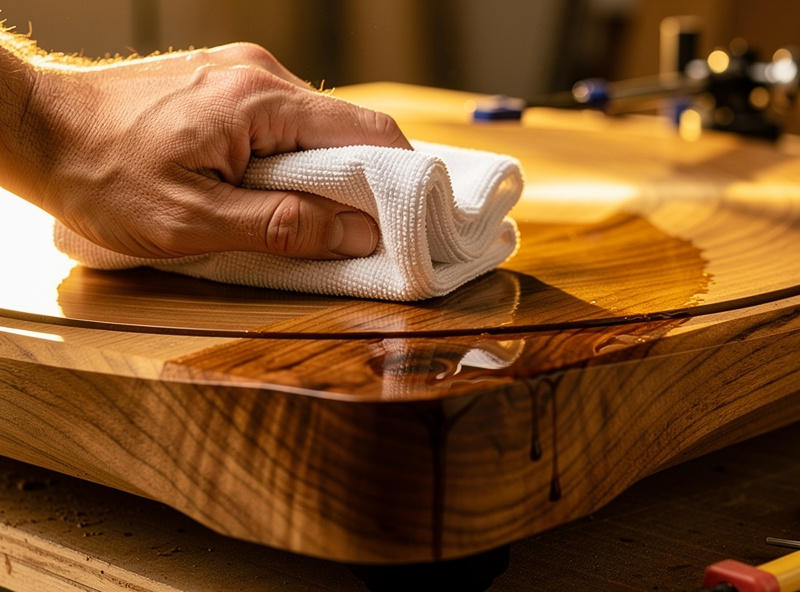
Tung oil (recommended). Penetrating finish that hardens within the wood rather than building a film on top. 3-4 coats over 2 weeks, light sanding between coats. Result: warm satin sheen, full wood character preserved, food-safe.
Hard wax oil (Osmo Polyx, Rubio Monocoat). Hybrid penetrating finish with mineral and natural oils plus a wax content. 2 coats, 24 hours apart. Faster cure than tung oil. Result: durable matte to satin sheen, fingerprint-resistant.
Shellac + paste wax. Traditional approach. Brush 2-3 thin coats of dewaxed shellac, then buff with paste wax. Fast cure, easy to repair if damaged. Result: warm amber tone (especially with garnet shellac), classic look. Less durable to spills than oil finishes.
Avoid: Polyurethane (too thick a film), spray lacquer (over-builds quickly, dampens sound noticeably), water-based polyurethane (less character than oil-based but still over-builds for plinth work).
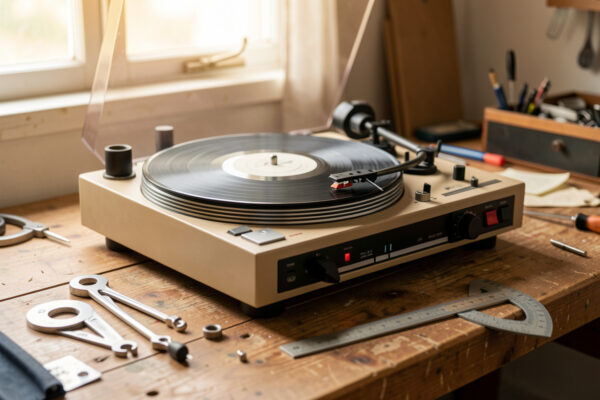
Installing the Turntable on the New Plinth
Migration from stock to CNC-cut plinth takes 1-3 hours depending on the turntable. The process:
- Remove platter, mat, and dust cover
- Detach motor wires from the existing motor block
- Detach tonearm wiring (note color codes; phono leads are L+/L-/R+/R-/ground)
- Remove bearing housing, motor, and tonearm assembly from old plinth
- Test-fit each component in the new plinth pockets — should drop in with light friction, not require force
- Install motor first, secure with bolts
- Install bearing housing, secure with bolts
- Install tonearm boss, align to known pivot-to-spindle distance with template
- Reconnect motor wires and tonearm wiring
- Place platter, set tracking force and anti-skate per cartridge spec
- Verify with test record (HFN test record or similar) for tracking and bearing wobble
The single most common mistake at this stage: leaving slight gaps around the bearing housing, hoping "it will be fine". It will not. Take the bearing back out, identify the high spots in the well, and CNC a 0.05-0.1mm relief pass to clean it up. The bearing must seat fully against the wood with no rocking.
According to Audio Engineering Society historical research on turntable design, the contribution of the plinth to sonic character lies primarily in resonance damping at frequencies between 80-300 Hz — exactly the frequencies that solid hardwood handles better than MDF. The acoustic theory supports the practice.
Cost and Time Math
Sample build: a walnut plinth for a Pro-Ject X1 turntable.
- Walnut blank (15"x12"x2"): $55
- Tung oil and finishing supplies: $25
- Compliant feet (4x sorbothane): $20
- CAD design time: 2-3 hours
- CAM toolpath: 1 hour
- CNC cutting: 90-120 minutes
- Sanding, oiling, drying: 2-3 hours active over 2 weeks
- Installation: 90 minutes
Total $100 in materials plus your time. Compare to retail walnut plinths from Acoustic Signature, Pro-Ject Wood Edition, or boutique builders at $400-2500. A CNC plinth is a one-shop weekend that produces audiophile-tier results.
For broader turntable upgrade context that pairs with the plinth project, the turntable upgrade guide covers the order in which upgrades give the best returns. The platter upgrades reference covers the next logical upgrade after the plinth, and the 3D-printed turntable accessories project covers the print side that pairs with the CNC half of a complete vinyl maker workflow.
Frequently Asked Questions
What wood is best for a turntable plinth?
Walnut for warmth, hard maple for fast transients, cherry for smooth top end. All three machine cleanly on a desktop CNC and finish well with tung oil. Solid Baltic birch plywood is a great budget option that performs surprisingly well due to its cross-grain layered structure. Avoid pine, MDF, and highly figured exotic woods.
How thick does a turntable plinth need to be?
35-50mm minimum for adequate mass to damp resonance. Below 30mm thickness, the plinth lacks the mass needed to control low-frequency vibration. Above 60mm becomes visually heavy and adds little acoustic benefit. Most factory plinths sit in the 35-45mm range.
Can I make a plinth without CNC?
You can make most of it with hand tools, but the bearing well and motor pocket need tighter tolerance than hand work reliably delivers. The bearing seat in particular must be within 0.1-0.2mm of bearing housing diameter or wow and flutter increase noticeably. CNC handles those critical features in one operation.
What CNC settings work for hardwood plinths?
Walnut at 1500-1800 mm/min feed and 3-5mm depth per pass works well with a 6mm 2-flute upcut spiral. Maple needs slightly slower feed (1200-1500 mm/min) and shallower depth (2-3mm) due to higher density. Use a 3mm finishing pass on the visible surfaces for clean results.
What finish should I use on a wood plinth?
Pure tung oil or a hard wax oil like Osmo Polyx. Both are penetrating finishes that preserve the natural acoustic character of the wood. Avoid polyurethane and spray lacquer — they build a film on top of the wood that dampens the sound character that motivated using wood in the first place.
Will a heavier plinth always sound better?
To a point. Mass damps low-frequency resonance and reduces motor noise transmission. Beyond about 8-10 lb of plinth weight, returns diminish. The right balance is mass that quiets the noise floor without producing a sluggish or thick midrange. Solid hardwood at 35-50mm thickness hits the right zone for most belt-drive and direct-drive turntables.
How long does a CNC plinth project take?
Plan a weekend for the active work plus 2 weeks of finishing time for tung oil curing. Active work breaks down to 3-4 hours of design, 2 hours of CNC cutting, and 90-minutes installation. Tung oil takes 4-7 days between coats — start the finish on day 1 and you can install the turntable on day 14-15.