A vintage turntable is worth buying when the chassis, bearing, and tonearm are mechanically sound — everything electrical and consumable (belt, capacitors, stylus, grease) can be renewed for well under the cost of a comparable new deck. That is the whole proposition behind any honest vintage turntable buying guide: you are buying the heavy, hard-to-replace engineering and accepting a weekend of service work.
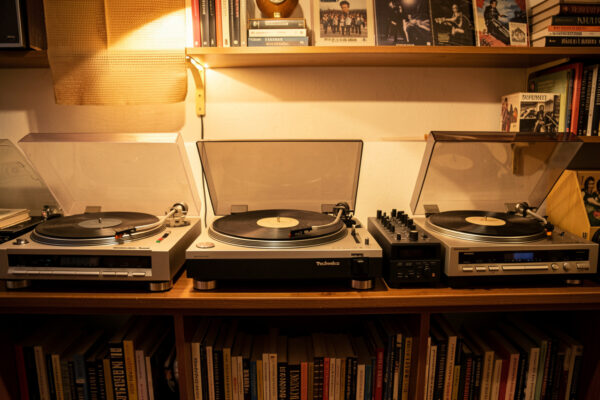
I run a Technics SL-1200-class direct drive as my speed-stability reference, with a rebuilt Rega P3 and a Pro-Ject belt deck beside it on the bench. Living with all three has made me allergic to the romance that surrounds old tables. A 1970s deck is not magic; it is a mechanical problem — resonance, speed stability, and geometry — that someone solved well forty years ago and that has since drifted out of tolerance. This guide is how I decide whether a given vintage deck is worth carrying home, and the order I bring it back to spec once it is on the bench.
Why Buy Vintage at All
The case for vintage is that the expensive parts age well and the cheap parts are replaceable. A cast-aluminium platter, a machined main bearing, and a well-damped tonearm cost real money to manufacture, and a good one from 1976 is still a good one in 2026. What dies is consumable: rubber belts perish, electrolytic capacitors dry out, lubricating grease turns to varnish, and styli wear flat. None of that is structural. I have brought decks back to dead-quiet, speed-accurate playback for the price of a belt, a capacitor kit, and an afternoon, on chassis that would cost four figures to reproduce new.
The counter-argument is honest too: a new Pro-Ject or Rega arrives aligned, warrantied, and fitted with a modern cartridge, and for a beginner that certainty is worth a lot. Vintage rewards the person who enjoys the setup work as much as the listening. If turning a screwdriver bores you, buy new. If a dial gauge and a protractor are your idea of a good Saturday, vintage is the better value by a wide margin.
The Three Vintage Drive Types and What They Mean for You
Vintage decks come in three drive systems, and the differences matter more on old machines than on new ones because the failure modes differ. Direct drive (Technics, early Denon, Pioneer) couples the platter straight to the motor; speed stability is excellent and there is no belt to perish, but the motor electronics and Hall sensors can fail and are harder to source. Belt drive (Thorens, Rega, Linn, most Duals) isolates motor vibration through a rubber belt — quiet and serviceable, but every belt is a perished consumable until proven otherwise. Idler drive (Garrard 301/401, Lenco, older Duals) uses a rubber wheel between motor and platter rim; torque and speed stability are superb, but the idler wheel hardens and flat-spots, transmitting rumble.
None of these is universally best, and the belt-versus-direct argument is over-fought even on new gear — I cover that in depth in my belt drive vs direct drive comparison. On a vintage deck, the more useful question is which consumable you are willing to chase: a belt (easy), an idler wheel (harder, often re-rubbered), or motor electronics (specialist). Match the drive type to the parts you can actually get.
What to Inspect Before You Buy
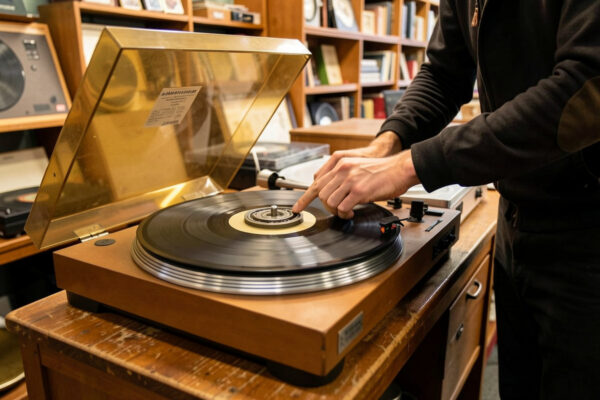
The buying decision lives in the bearing, the tonearm, and the chassis — the parts you cannot cheaply replace. Spin the platter by hand with the belt off: it should rotate freely and coast for several seconds with no grinding, no side-to-side rock, and no audible scrape from the main bearing. Lift the tonearm and move it across its arc: the bearings should feel smooth with zero notchiness and no lateral play when you wiggle the headshell. Check that the cueing lift still raises and lowers slowly rather than dropping like a stone. Everything else — belt, cartridge, lid, mat, even dried switch contacts — is renewable.
I treat suspension as a yellow flag rather than a red one. Sprung sub-chassis decks (Thorens TD-160, Linn, AR) need their suspension re-set and sometimes re-greased, which is fiddly but doable. Seized or sagging suspension is a negotiating point, not a deal-breaker. The full inspection routine, the price tiers, and the questions to ask a seller are in my dedicated guide to buying a vintage turntable, and once you know what good condition looks like, my shortlist of the best vintage turntables to buy narrows the field to the models that reward the effort.
| Drive Type | Speed Stability | Main Consumable | Service Difficulty | Classic Examples |
|---|---|---|---|---|
| Direct drive | Excellent | None (motor electronics rare-fail) | Low to repair, high if motor dies | Technics SL-1200/1210, SL-1500 |
| Belt drive | Very good (with fresh belt) | Rubber belt | Low — belt and bearing service | Thorens TD-160, Rega Planar, Dual CS |
| Idler drive | Excellent (high torque) | Idler wheel | Medium — wheel re-rubber | Garrard 301/401, Lenco L75 |
The Service Work, in the Order I Do It
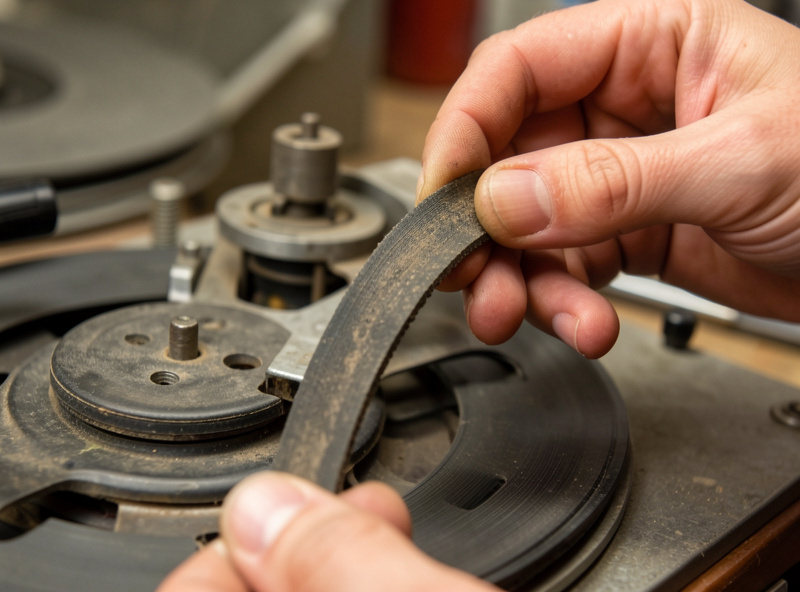
Once a deck is home, I work from the platter down in a fixed order so nothing gets re-done. First the belt or idler: a fresh, correctly-sized belt fixes more speed and noise complaints than any other single part, and a perished one masks every other measurement. My step-by-step belt replacement walkthrough covers sizing a belt by measuring the old one and the pulley path rather than guessing. Second the bearing: drain the old varnished oil, clean the well, and re-oil with the correct viscosity — the difference in rumble is immediate and measurable, and I detail it in my bearing maintenance guide.
Third the tonearm: clean and, where needed, re-lubricate the gimbal or unipivot, reset bearing play, and check the wiring for the brittle, oxidised joints that cause channel dropout. A neglected vintage arm is the single biggest hidden cost, so I gave it its own tonearm refurbishing guide. The complete tear-down-to-spec sequence — including switch cleaning, motor mounts, and speed adjustment — lives in my vintage turntable servicing guide.
Spend Your Money in the Right Order
This is the part most buyers get backwards. The upgrade path that actually moves the sound is cleaning, then setup, then phono stage, then cartridge, then table — in that order. On a vintage deck the first three are nearly free. A clean record on a properly aligned cartridge through a decent phono stage will outperform an expensive cartridge mounted carelessly on a dirty system every time. I have proven this to myself on the bench more than once, and it never reverses.
For a freshly serviced vintage table, that means: clean your records (start with my record cleaning guide), align the cartridge properly with a two-point protractor (my cartridge alignment guide walks the null points), set tracking force and anti-skate by gauge (how to set tracking force and anti-skate), and only then think about the phono stage and a new cartridge. The table itself is the last thing you should spend on, which is exactly why buying a sound vintage chassis cheaply is such good value.
Setting It Up: Geometry First, Romance Second
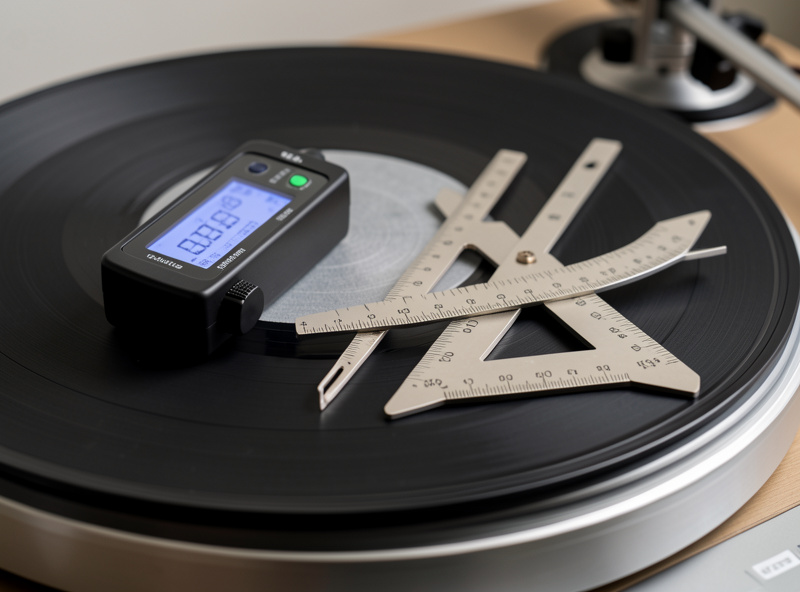
A vintage deck is only as good as its alignment, and alignment is geometry, not taste. The cartridge has two null points across the record where tracking error falls to zero — Baerwald and Stevenson are the common alignment standards, and on my protractor I default to Baerwald for the lowest average distortion across the side. Overhang, offset angle, vertical tracking force (VTF), vertical tracking angle (VTA/SRA), azimuth, and anti-skate all interact, and getting them right is what separates a vintage deck that sings from one that sounds tired. The complete dial-it-in sequence is in my turntable setup and calibration guide.
The one number people ignore is VTF accuracy. I set tracking force with a digital gauge that reads to 0.01g, in the middle of the cartridge maker’s specified range, because a stylus tracking light wears records and a stylus tracking heavy wears itself. Guessing by the arm’s calibrated dial — on a forty-year-old arm whose spring has aged — is how people quietly destroy both records and styli.
The DIY Side: Plinths, Mats, and Isolation
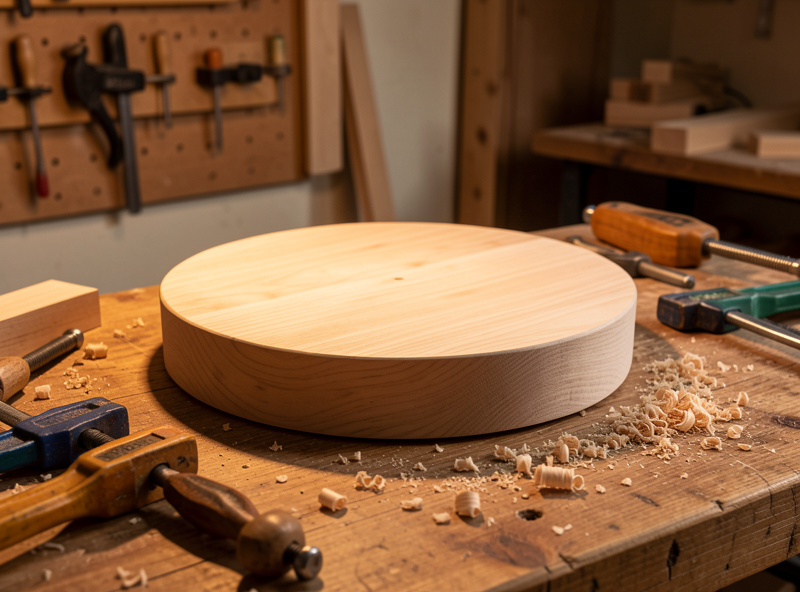
Vintage is where my workshop meets the listening room, and the cheapest real upgrades to an old deck are mechanical, not electronic. A heavy, well-damped plinth lowers the resonant frequency of the whole system and kills the boom that smears bass. I have routed solid-wood plinth blanks on the same CNC that cuts wall panels for the smart-home builds — the crossover project is written up in my DIY turntable plinth guide — and the difference under a turning platter is not subtle.
Beyond the plinth, the platter mat changes the mechanical interface between record and platter (cork, felt, leather, and rubber all behave differently — see my platter mat comparison), and isolation feet or a wall shelf stop footfalls from reaching the stylus. My full vibration isolation guide covers what measurably works versus what is audio jewellery. These are the upgrades that justify keeping a vintage deck instead of trading up.
Matching a Cartridge to a Vintage Arm
Here is the mistake that wastes the most money on a vintage rebuild: bolting a fashionable modern cartridge onto an old arm without checking compliance. The tonearm and cartridge form a spring-mass system, and you want its resonance to land between 8 and 12 Hz — below the audible band but above the warp and footfall frequencies. A heavy vintage arm (high effective mass) paired with a high-compliance modern cartridge resonates too low and gets excited by warps; a light arm with a stiff, low-compliance cartridge resonates too high and lets the bass go thin.
Most classic Japanese and European arms sit in the medium-mass range and partner happily with a medium-compliance moving-magnet like the Audio-Technica VM95 family or an Ortofon 2M, which is exactly why those carts are my default recommendation for a first vintage rebuild. The exotic moving-coils and the very-high-compliance shibata cartridges are where you start needing to do the resonance arithmetic rather than guessing. I lay out the moving-magnet versus moving-coil decision, stylus profiles, and loading in my phono cartridge guide, and the geometry of mounting whatever you choose is in the alignment guide.
Speed Accuracy: The Strobe Check That Settles Arguments
Before you trust any vintage deck, confirm it actually runs at 33.33 rpm. A perished belt, a slipping idler, or a dried motor bearing all show up as speed error, and speed error is the one fault your ear notices instantly as a sour, drifting pitch. I check every incoming deck with a strobe disc under a mains-flicker lamp or a phone strobe app, watching whether the dots lock still or creep. Creeping dots mean the speed is off; dots that wander back and forth mean wow and flutter from a tired bearing or a flat-spotted idler.
Direct-drive decks usually have a speed trim pot and lock dead-on once adjusted. Belt decks correct with a fresh, correctly-sized belt and, on AC-synchronous designs, a stable mains frequency. If a belt deck still runs fast or slow after a new belt, the pulley may be worn or the motor mount shifted. This is measurable, repeatable, and not a matter of taste, which is why I trust the strobe over any reviewer telling me a table “sounds” speed-stable. The fix for the most common cause is in my belt replacement guide; the bearing side is covered under bearing maintenance.
Vintage vs Modern: Picking the Battle
If you want the head-to-head between the three vintage marques that come up most — Technics, Dual, and Thorens — I broke them down in my Technics vs Dual vs Thorens comparison, because they represent three genuinely different design philosophies (direct-drive precision, clever German automation, and sprung-suspension belt-drive musicality). For a broader sense of where vintage sits against current models, my roundup of the best current turntables and the Audio-Technica lineup gives you the modern baseline to measure a vintage buy against.
My honest verdict after years of running both: a well-serviced vintage deck at the $150–$400 used tier punches well above a new deck at the same price, because you are buying engineering that the budget new market simply does not include anymore. Above roughly $600 the calculus shifts, and a current Rega or Pro-Ject with a fresh cartridge and a warranty starts to make more sense for most people. Vintage is a value play in the middle of the market, not a flex at the top.
The Hidden Costs Nobody Lists
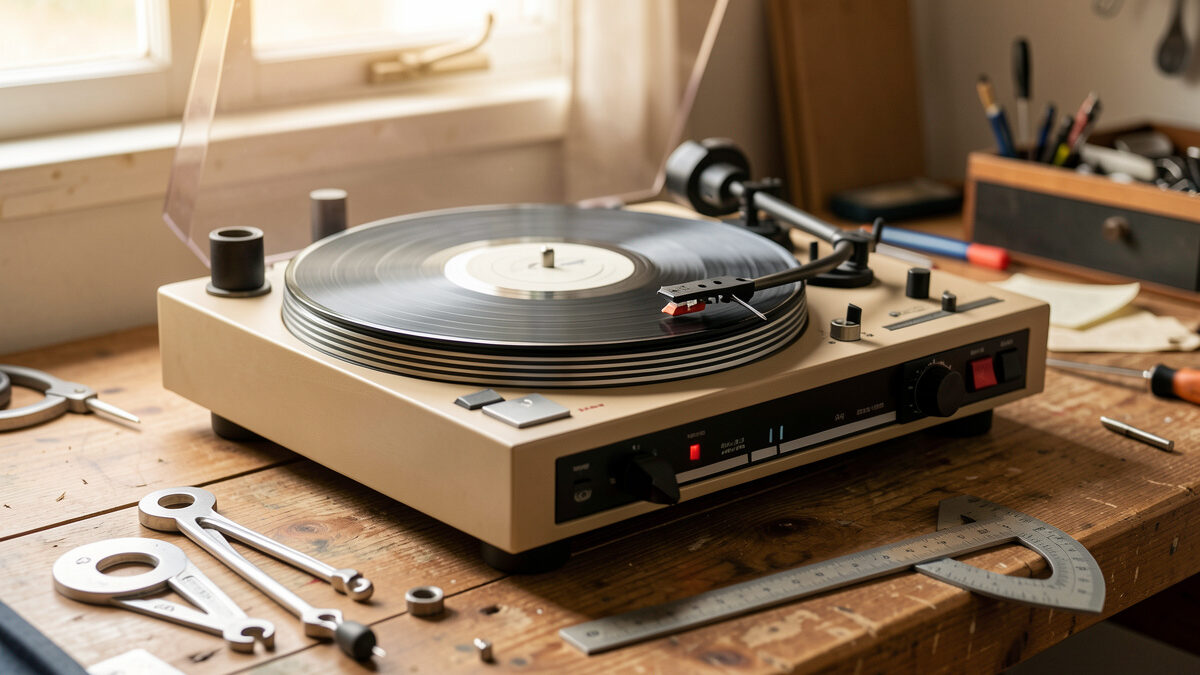
When I budget a vintage rebuild, I add three line items that the purchase price never mentions. First, a stylus or cartridge: an old stylus is almost always worn, and a new VM95 or 2M-class cartridge is the single biggest predictable spend on most rebuilds. Second, consumables and chemicals: a belt, a small bottle of the correct bearing oil, contact cleaner for scratchy switches, and a capacitor or two for the older direct-drive boards. Third, alignment tools if you do not own them yet — a two-point protractor and a digital stylus-force gauge, which you buy once and use forever across every deck you ever own.
Tallied up, that is usually a modest sum against a chassis that would cost many times more to buy new at the same build quality. But going in with eyes open is the difference between a satisfying project and a regretted one. A deck that needs only a belt and an oil change is a bargain; a deck that needs a cartridge, a re-cap, a re-wire, and a suspension rebuild can quietly cost more than a clean used Rega. Price the whole job, not the sticker.
Reading an Online Listing Without Getting Burned
Most vintage decks now change hands online, sight unseen, so the listing photos and wording are your inspection. I zoom into three things first. The stylus and cantilever: a bent cantilever or a visibly worn, asymmetric stylus tip means a new cartridge or re-tip is coming, so price it in. The platter and plinth edges: corrosion on the platter rim or swollen, lifting veneer hints at damp storage, which is bad news for bearings and switch contacts. And the tonearm gimbal: blurry close-ups of the bearing housing are often hiding play or a previous bad repair.
In the text, I look for the tells that the seller actually used the deck recently — “spins up to speed,” “plays through cleanly,” a recent belt — versus the estate-clearance language (“found in a loft, untested, sold as seen”) that means assume the worst and bid accordingly. Untested is not automatically a no; it is a price. A “loft find” Thorens at a quarter of a serviced one is a project I will take on; the same table at near-serviced money is a gamble I will pass. The detailed listing-questions checklist and the price tiers are in my buying guide.
Frequently Asked Questions
Is a vintage turntable worth buying in 2026?
Yes, if the bearing, tonearm, and chassis are mechanically sound. The expensive engineering ages well, while consumables like belts, capacitors, and grease are cheaply renewable. A serviced vintage deck at the $150 to $400 used tier typically outperforms a new deck at the same price.
What should I check before buying a used turntable?
Spin the platter with the belt off to check for free, quiet rotation and no bearing rock. Move the tonearm across its arc feeling for notchiness or lateral play, and confirm the cueing lift still works. The bearing, tonearm, and chassis are the parts you cannot cheaply replace.
How much does it cost to service a vintage turntable?
A basic refresh is often just a belt, a bottle of bearing oil, and an afternoon. A fuller service adding a capacitor kit, switch cleaning, and a new stylus still usually lands well under the cost of a comparable new deck. The chassis you are restoring would cost four figures to reproduce new.
Which is better for vintage: belt, direct, or idler drive?
None is universally best. Direct drive has excellent speed stability and no belt, but rarer motor electronics. Belt drive is quiet and easy to service. Idler drive offers high torque but needs the idler wheel re-rubbered. Choose the drive type whose consumables you can actually source.
Should I align a vintage cartridge with Baerwald or Stevenson?
Baerwald gives the lowest average tracking distortion across the whole side and is my default on the protractor. Stevenson minimises distortion at the inner grooves specifically, which some prefer for classical. Both set two null points; the choice changes where on the record the error is lowest.
What is the best first upgrade for a vintage turntable?
Cleaning and setup, not new gear. A clean record on a properly aligned cartridge through a decent phono stage beats an expensive cartridge mounted carelessly. Spend in this order: cleaning, alignment, phono stage, cartridge, then the table itself.