Buying a vintage turntable well comes down to one rule: pay for the parts you cannot replace and ignore the parts you can. The bearing, the tonearm, and the chassis are the deal; the belt, stylus, lid, and grease are afternoon fixes. Get that order right and a $200 deck outperforms a new one at the same price — get it wrong and you have bought someone else’s problem.
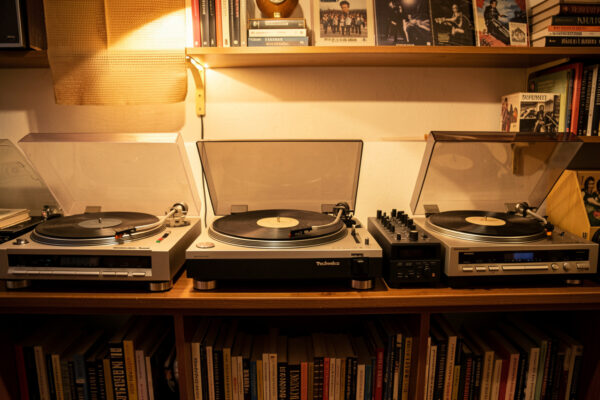
I have carried home more old decks than I can count, and the ones I regretted all failed the same way: I fell for cosmetics and skipped the mechanical check. This is the field routine I now run on every vintage table before money changes hands, whether it is on a shop shelf or a blurry online listing. It pairs with my broader vintage turntable buying guide, which covers the service work once the deck is home.
The Three Parts That Decide Everything
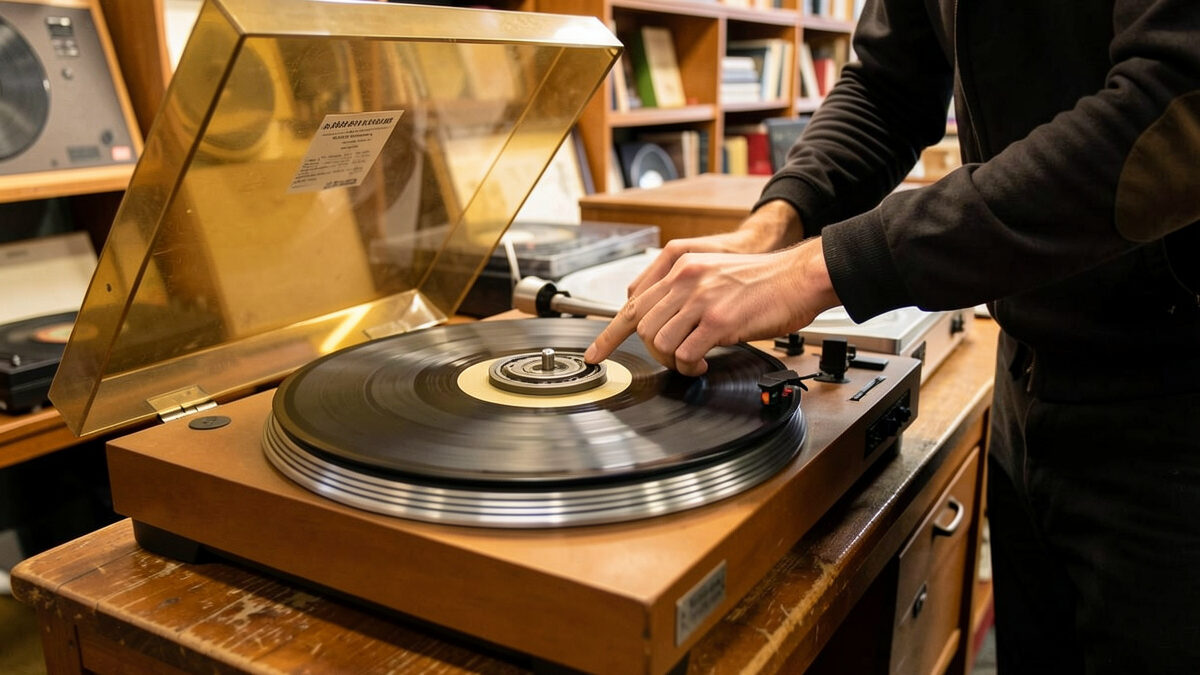
Before anything else, inspect the bearing, the tonearm, and the chassis — these are the expensive-to-reproduce components, and a fault in any of them changes the price by a lot. With the belt off, spin the platter by hand: it should coast smoothly and silently for several seconds. Grinding, a gritty rumble, or visible side-to-side rock means a worn main bearing, which is the most expensive thing to put right. Everything downstream of those three parts is consumable and cheap.
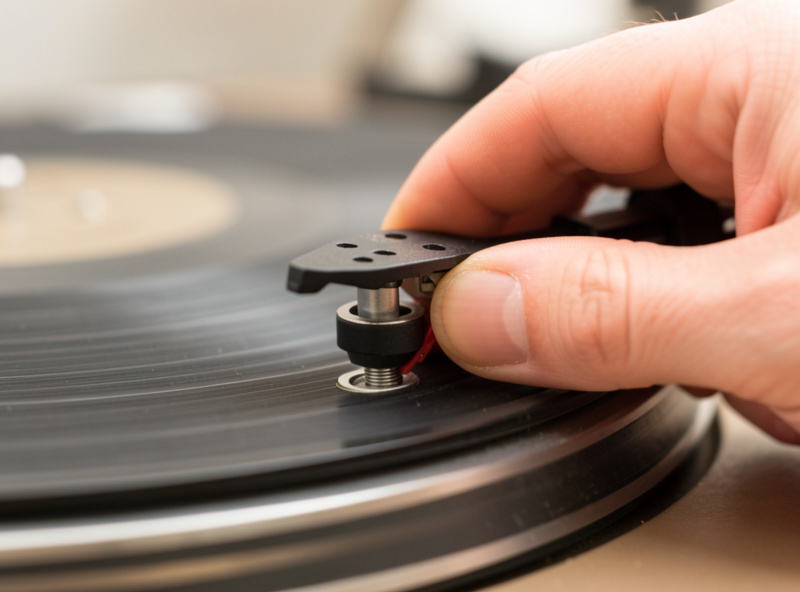
The tonearm is next. Lift it off the rest and sweep it across its full arc, feeling for notchiness or stiffness in the bearings, then gently wiggle the headshell laterally and vertically for play. A good arm moves like it is floating in oil with no detectable slop. The full arm assessment, and how to bring a tired one back, is in my tonearm refurbishing guide.
What You Can Safely Ignore
Sellers price decks on cosmetics, which is exactly where the bargains hide. A perished belt, a missing or yellowed dust cover, a tired stylus, scratchy speed switches, and dried, varnished bearing grease all sound alarming in a listing but are routine, low-cost fixes. I have talked plenty of money off a deck because the platter “didn’t spin up” when the only fault was a forty-year-old belt that had turned to liquorice. Walk in knowing the difference between scary-looking and actually-broken.
The big exception is the cartridge and stylus. An old stylus is almost always worn, and a worn stylus damages records, so budget for a fresh cartridge as a near-certainty rather than a maybe. A medium-compliance moving-magnet like an Audio-Technica VM95 or Ortofon 2M suits most vintage arms, and getting it aligned properly matters more than what it cost — my cartridge alignment guide walks the geometry.
Price Tiers: What Your Money Actually Buys
Vintage prices are all over the place, so it helps to think in condition tiers rather than absolute numbers. The table below is how I mentally bucket a listing the moment I read it, and it tells me roughly how much service work I am signing up for.
| Tier | What You Get | Work Needed | Who It Suits |
|---|---|---|---|
| Untested “loft find” | Unknown mechanicals, cheap price | Full service likely: belt, bearing, arm, maybe cap kit | Tinkerers who enjoy the rebuild |
| Working but unserviced | Spins and plays, original consumables | Belt, oil, clean switches, new stylus | Most hobbyist buyers |
| Recently serviced | Fresh belt, set up, often new cartridge | Verify alignment, enjoy | Buyers who want to play, not fix |
| Restored / refurbished by a specialist | Rebuilt to spec, premium price | None | Buyers paying for certainty |
An untested deck at a quarter of a serviced one is a project worth taking on; the same deck at near-serviced money is a gamble. Price the whole job, not the sticker — if a rebuild needs a cartridge, a belt, switch cleaner, and bearing oil, that adds up against a clean used Rega or Pro-Ject.
The Tools to Bring (or Buy First)
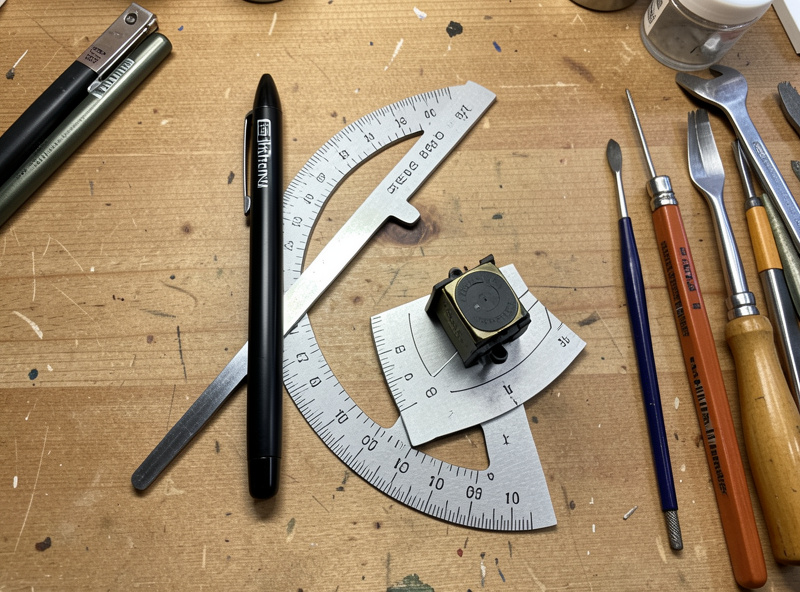
Two tools turn vintage buying from guesswork into a measured decision, and you buy them once and use them on every deck you ever own. A digital stylus-force gauge that reads to 0.01g lets you set tracking force precisely instead of trusting a forty-year-old arm dial whose calibration spring has aged. And a two-point alignment protractor lets you set overhang and the null points correctly, which is the single biggest factor in how a vintage deck actually sounds.
If you do not own them yet, get a digital stylus force gauge and a two-point alignment protractor before your first vintage purchase — they cost a fraction of a cartridge and protect every record you play. As an Amazon Associate I earn from qualifying purchases.
Reading an Online Listing
Most vintage decks now sell sight-unseen, so the photos are your inspection. Zoom into the cantilever and stylus tip for bends or asymmetric wear, the platter rim and plinth veneer for corrosion or damp-swelling, and the tonearm gimbal for blurry shots hiding play or a bad past repair. In the text, “spins up to speed” and “recent belt” mean the seller used it recently; “found in a loft, untested, sold as seen” means assume the worst and bid accordingly.
Ask three questions before bidding: does it power on and reach speed, is there any hum or rumble through a system, and has the belt or cartridge been replaced recently. Honest answers tell you which price tier you are really in. Once you know the deck is mechanically sound, my shortlist of the best vintage turntables to buy helps you decide whether this particular model is one worth the effort.
Drive Type and Speed
Vintage decks are direct drive, belt drive, or idler drive, and the choice matters mainly for which consumable you will chase — I cover the trade-offs in my belt vs direct drive comparison. Whatever the drive, confirm speed before you commit: a strobe disc under a flickering lamp, or a phone strobe app, shows whether the platter holds 33.33 rpm. Dots that creep mean the speed is off; dots that wander mean wow and flutter from a tired bearing or flat-spotted idler. It is a thirty-second check that catches the faults your ear hates most.
Once the deck is home and verified, the setup work begins, and that is where a vintage table is won or lost. My setup and calibration guide and bearing maintenance guide take it from there.
Frequently Asked Questions
What should I check first when buying a used turntable?
Check the bearing, tonearm, and chassis first, because those are the parts you cannot cheaply replace. Spin the platter with the belt off for free, silent rotation, and sweep the tonearm feeling for notchiness or play. Belt, stylus, and switches are cheap fixes you can ignore at purchase.
Is an untested vintage turntable worth buying?
It can be, if the price reflects the risk. An untested deck at a quarter of a serviced one is a good project; the same deck at near-serviced money is a gamble. Budget for a belt, bearing oil, switch cleaner, and very likely a new stylus before you decide.
Do I need to replace the cartridge on a vintage turntable?
Almost always, yes. An old stylus is usually worn, and a worn stylus damages records. Budget a fresh medium-compliance moving-magnet cartridge like an Audio-Technica VM95 or Ortofon 2M as a near-certainty, and align it properly with a two-point protractor.
How do I check turntable speed before buying?
Use a strobe disc under a flickering mains lamp, or a phone strobe app. Dots that lock still mean correct speed; dots that creep mean the speed is off; dots that wander back and forth mean wow and flutter from a tired bearing or a flat-spotted idler wheel.
What tools do I need to buy a vintage turntable properly?
A digital stylus-force gauge reading to 0.01g and a two-point alignment protractor. Together they let you set tracking force and geometry precisely instead of trusting an aged arm dial. You buy them once and use them on every deck you ever own.