Dry Cleaning: The 5-Second Pre-Play Routine
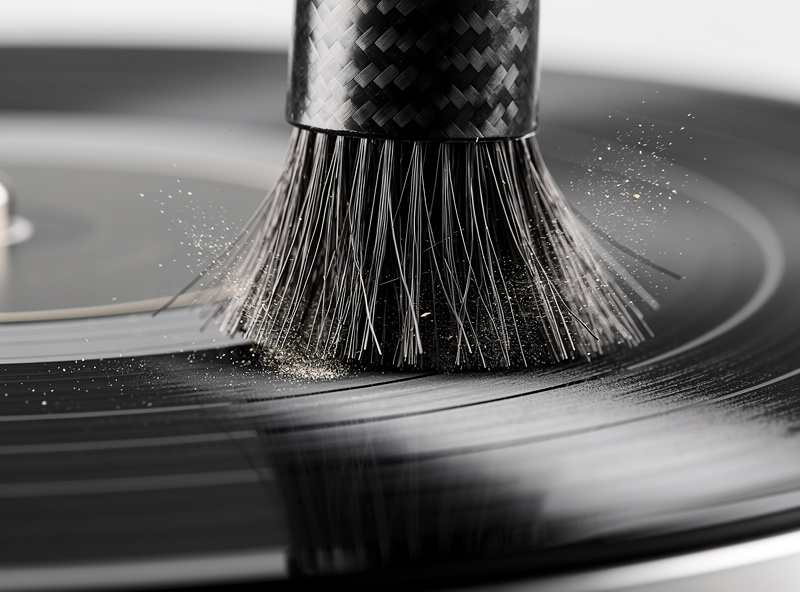
Dry cleaning with a carbon fiber brush is the fastest, most essential cleaning step in vinyl record maintenance. Before every play, a quick sweep removes the surface dust that accumulates between listening sessions. This dust — invisible to the naked eye but clearly audible through a stylus — causes pops, crackle, and hiss that obscure the music. Five seconds of brushing eliminates this noise and prevents dust from being pressed into the groove walls where it causes permanent scratches.
Use a dedicated anti-static carbon fiber brush, not a generic cleaning brush. Carbon fiber bristles are thin enough to reach into the 40-micron-wide grooves, and their conductive properties discharge static electricity that attracts airborne dust. The AudioQuest Anti-Static Record Brush ($18) is the industry standard — its two rows of approximately 12,000 carbon fiber bristles sweep effectively without applying pressure that could damage the groove. When surface dust exceeds what dry brushing can handle, the wet cleaning guide for vinyl records covers the full manual scrub process for tackling embedded contamination, mold residue, and new-pressing compound.
Step-by-step dry cleaning process:
1. Place the record on the turntable and start the platter spinning at 33⅓ RPM.
2. Hold the brush gently on the record surface, letting the bristles contact the grooves without pressing down. The weight of the brush is sufficient — do not push.
3. Let the brush ride the spinning record for 3–4 full rotations. The bristles sweep dust out of the grooves while the conductive fibers dissipate static charge.
4. Slowly drag the brush toward you and off the edge of the record while the platter continues spinning. This pulls the dislodged dust away from the grooves rather than redistributing it.
5. Clean the brush bristles by wiping them on a clean cloth or using the brush’s built-in pad. Repeat before the next record.
Never blow on a record to remove dust. Your breath contains moisture and micro-particles that deposit on the surface and attract more dust. Never use compressed air — the propellant leaves a chemical residue. The carbon fiber brush is the only dry cleaning tool you need.
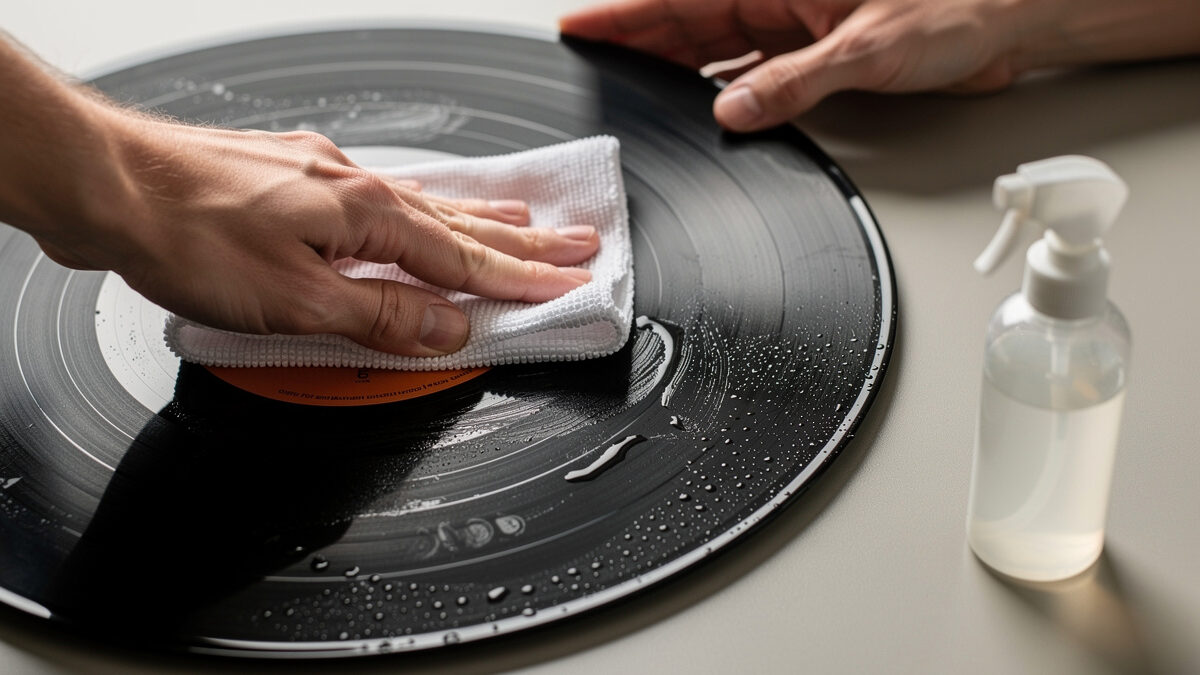
Wet Cleaning: Manual Scrubbing Method
Wet cleaning removes contaminants that a dry brush cannot reach — embedded dust, finger oil residue, mold release compound from new pressings, and light mold or mildew on used records. The cleaning solution penetrates into the grooves, loosening contaminants while a velvet or microfiber brush scrubs them free. This method is the standard maintenance clean recommended every 20–50 plays.
What you need: A velvet or microfiber record brush, a bottle of record cleaning solution, a clean microfiber cloth, and a stable surface to work on. The Audio-Technica AT634a kit ($25) includes all of these components. Alternatively, a spray bottle of cleaning solution and a separate microfiber cloth work just as well.
Step-by-step wet cleaning process:
1. Place the record on a clean, lint-free surface — a microfiber towel on a table works well. Some collectors use a dedicated cleaning mat or a second turntable platter.
2. Apply 3–4 drops of cleaning solution directly onto the record surface, spreading it across the grooves. If using a spray bottle, mist the surface lightly — do not saturate the record. Fluid should not pool on the surface or run toward the label.
3. Place the velvet brush pad on the record and gently follow the groove direction — from the label outward toward the edge. Move radially, not in circles. Circular cleaning pushes contaminants across grooves rather than out of them. Make 2–3 passes, applying light pressure.
4. Flip the record and repeat on the B side.
5. Wipe the record dry with a clean microfiber cloth, again following the groove direction radially. Use a different cloth than the one used for scrubbing — you do not want to redeposit contaminants you just removed.
6. Allow the record to air dry for 30–60 seconds before placing it on the turntable. Playing a wet record damages both the stylus and the groove.

DIY Cleaning Solution Recipes
Commercial record cleaning solutions are convenient, but you can make equally effective solutions at home for a fraction of the cost. The key ingredient is a surfactant — a substance that reduces the surface tension of water, allowing it to flow into the grooves instead of beading on the hydrophobic PVC surface.
Basic recipe (distilled water + surfactant): Mix 1 liter of distilled water with 2 drops of Kodak Photo-Flo 200 surfactant. Photo-Flo is a photographic wetting agent used to prevent water spots on film. It leaves zero residue and costs approximately $8 for a bottle that lasts years. This solution cleans effectively and is safe for all vinyl formulations.
Enhanced recipe (for heavy contamination): Mix 950ml distilled water + 50ml 91% isopropyl alcohol + 2 drops Photo-Flo. The alcohol adds additional surfactant power and helps dissolve oily residue. Keep alcohol concentration at or below 5% to avoid PVC damage. This recipe is particularly effective for used records with unknown contamination history.
Enzyme recipe (for organic residue): Mix 1 liter distilled water with 1ml of Tergitol-type surfactant (available from chemical suppliers) and a trace of enzyme cleaner designed for protein-based contamination. This advanced recipe breaks down biological residue — mold, skin oils, food contamination — that standard surfactants cannot fully dissolve. Use only on records you have verified are standard PVC, not shellac.
What to NEVER use: Tap water (mineral deposits), dish soap (leaves film), window cleaner (ammonia damages PVC), Windex, rubbing alcohol above 10% concentration, acetone, furniture polish, or any petroleum-based solvent. These products either leave residue, attack the PVC material, or strip protective coatings from the groove surface.
Deep Cleaning Methods
When wet cleaning is not enough — used records with heavy contamination, mold, or decades of neglect — deep cleaning methods reach further into the grooves to restore playability.
Spin-Clean immersion washing ($80). Fill the Spin-Clean basin with distilled water and the included cleaning solution. Place the record between the two velvet pads in the bath and rotate it by hand for 3–5 full rotations in each direction. The pads scrub both sides simultaneously while the fluid captures loosened contaminants. Remove the record and dry immediately with the included lint-free cloths. The Spin-Clean processes 50+ records before the fluid needs changing, making it efficient for large batch cleaning sessions.
Vacuum machine cleaning ($400–$700). Machines like the VPI HW-16.5 ($500) and Pro-Ject VC-E ($400) apply cleaning fluid, scrub with a mounted brush, then vacuum the dirty fluid off the surface. Suction reaches deep into the grooves where manual wiping cannot. The entire process takes 1–2 minutes per side. Our reviews of the best record cleaners compare vacuum machines in detail.
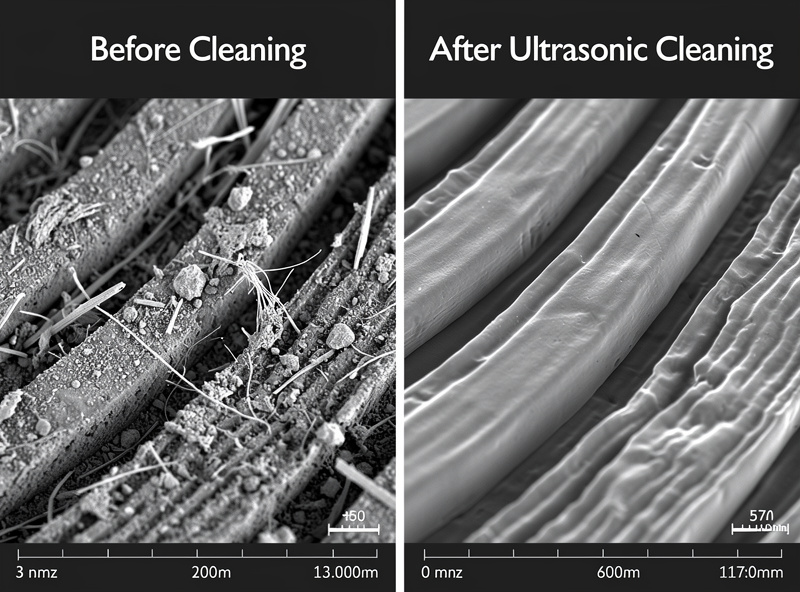
Ultrasonic cleaning ($500–$3,000). Ultrasonic cleaners create microscopic cavitation bubbles in a water bath that collapse and generate shockwaves, dislodging contaminants from the groove walls without any physical contact. The HumminGuru ($500) and Degritter ($3,000) automate the process — place the record in the machine, press start, and retrieve a clean record 5 minutes later. Ultrasonic cleaning is the most thorough method available and is the standard for restoring high-value used records.
Step-by-Step Ultrasonic Cleaning Process
Ultrasonic cleaning requires the machine itself, distilled water, and a surfactant. No brushes, cloths, or manual scrubbing are involved.
1. Fill the ultrasonic cleaner’s bath with distilled water. Add surfactant per the manufacturer’s instructions — typically 2–5 drops of Photo-Flo or the machine’s recommended cleaning additive.
2. Place the record in the machine’s holder, ensuring it sits centered and vertical in the bath. The record must be fully submerged.
3. Set the cleaning cycle. Most machines default to 5 minutes at 40 kHz. For heavily contaminated records, run two cycles. For routine maintenance cleaning, a single cycle is sufficient.
4. Start the machine. The transducer generates ultrasonic waves that create and collapse millions of cavitation bubbles per second. You may hear a faint buzzing — this is normal.
5. When the cycle completes, remove the record and allow it to drip-dry on a clean surface for 30–60 seconds. Some machines include a drying cycle that uses a gentle fan to accelerate drying.
6. Inspect the record surface under good lighting. If contamination remains (visible as haze or dark spots in the grooves), run a second cleaning cycle.
Ultrasonic fluid maintenance: Replace the bath water after every 20–30 records or when it becomes visibly cloudy. Contaminated fluid reduces cavitation effectiveness and can redeposit particles onto clean records. Some premium machines like the Degritter include automated fluid filtering and replacement.
What NOT to Do When Cleaning Records
Avoiding these common mistakes prevents permanent damage to your records.
Never use alcohol on shellac 78 RPM records. Shellac dissolves in alcohol. A single cleaning with a high-alcohol solution can destroy a 78 RPM record. Use only distilled water with a mild surfactant on shellac pressings. Verify the record material before cleaning any pre-1950 pressing.
Never use paper towels. Paper towels shed fibers that lodge in the grooves and increase surface noise. They are also abrasive — the wood-fiber texture scratches PVC. Always use lint-free microfiber cloths designed for optical or electronic cleaning.
Never scrub in circles. Circular cleaning pushes contaminants across grooves instead of lifting them out. Always follow the groove direction — radially, from the label to the outer edge. This carries contaminants out of the grooves along the path of least resistance.
Never submerge the label. Water seeping under the label causes it to bubble, wrinkle, and peel. When wet cleaning by hand, keep fluid away from the label area. When using a Spin-Clean or ultrasonic machine, ensure the label sits above the fluid line or is protected by the machine’s design.
Never play a wet record. A wet groove surface damages the stylus tip and can push contaminated fluid deeper into the grooves. Always dry records completely before playing. Thirty seconds of air drying plus a gentle wipe with a dry microfiber cloth is sufficient.
Never use household cleaning products. Windex, dish soap, glass cleaner, furniture polish, and bathroom cleaners contain chemicals that damage PVC, leave residue, or strip protective coatings. If you would not put it on your skin, do not put it on your record. Use only purpose-made record cleaning solutions or the distilled water recipes described above.
Cleaning Frequency by Record Condition
New records: Wet clean before first play to remove mold release compound. Then maintain with dry brushing before each play. Wet clean again every 30–50 plays.
Used records (unknown history): Deep clean immediately upon acquisition using vacuum, ultrasonic, or Spin-Clean immersion. Then maintain with dry brushing and periodic wet cleaning. The vinyl record care guide covers the importance of cleaning used records before their first play on your turntable.
Records from dusty environments: Dry brush before every play and wet clean every 10–20 plays. Dusty environments (near open windows, construction zones, workshops) require more frequent maintenance because airborne particles settle faster.
High-value collectible records: Clean once with ultrasonic or vacuum cleaning upon acquisition. Handle exclusively by the edges. Dry brush before each play. Wet clean infrequently — only when surface noise increases. Excessive cleaning of valuable records risks cumulative micro-abrasion from repeated brush contact.
How Cleaning Affects Sound Quality
The improvement from cleaning is immediate and measurable. A record with moderate surface contamination typically shows 15–20 dB of noise reduction after a thorough wet or vacuum clean. This means pops and crackle that were clearly audible become inaudible during musical passages, and quiet passages that were obscured by hiss become clean and detailed.
Professional mastering engineers clean every record before critical listening sessions. The difference between a dirty and clean record is larger than the difference between a $200 and $1,000 turntable — cleaning is the highest-ROI improvement in any vinyl playback system. Proper cartridge alignment and cleaning work together to extract the maximum possible sound quality from every pressing.
New records benefit the most from first-play cleaning. Mold release compound creates a haze across the groove surface that acts as a barrier between the stylus and the vinyl. Removing it reveals the full dynamic range, frequency response, and detail that the mastering engineer intended. Many collectors report that cleaning a new pressing is like hearing the record for the first time.
Frequently Asked Questions
Can I clean vinyl records with just water?
Distilled water alone cleans better than nothing but is not ideal. Water beads on hydrophobic PVC without a surfactant, leaving it on the surface instead of flowing into grooves. Add 2 drops of Kodak Photo-Flo per liter of distilled water to create an effective, residue-free cleaning solution for under $5 per gallon.
How do I clean really dirty used records?
For heavily contaminated used records, start with a Spin-Clean immersion wash ($80) or ultrasonic clean ($500). Apply an enzyme cleaning solution to break down organic residue, then follow with a vacuum or ultrasonic cycle. Two cleaning passes may be necessary for records with decades of accumulated contamination.
Is it safe to clean records with dish soap?
No, dish soap leaves a surfactant film that is extremely difficult to rinse completely from the grooves. This film increases surface noise and attracts dust. Use distilled water with Photo-Flo surfactant or a purpose-made record cleaning solution instead. Both leave zero residue when used correctly.
Can I use a washing machine to clean records?
No, washing machines damage records through excessive agitation, hot water, and detergent. The mechanical action scratches grooves, hot water warps PVC, and detergent leaves residue. Use only manual wet cleaning, Spin-Clean immersion, vacuum machines, or ultrasonic cleaners designed for records.
How long should I let a record dry after cleaning?
Air dry for 30–60 seconds after wiping with a microfiber cloth. The record should feel completely dry to the touch before placing it on the turntable. In humid environments, allow up to 2 minutes. Never play a wet or damp record — moisture damages the stylus and pushes contaminated fluid deeper into grooves.
Does cleaning remove scratches from records?
No, cleaning removes contaminants from the groove surface but cannot repair physical scratches that have altered the groove geometry. Scratches cause permanent pops because the stylus drops into the damaged section with each revolution. Cleaning reduces the noise surrounding scratches by removing dust that amplifies their audibility.
Related Articles
- Vinyl Record Care Guide: Protect Your Collection for Decades
- Best Record Cleaners 2026: Manual, Ultrasonic, and Vacuum Compared
- Record Storage Tips: Keep Your Vinyl Collection Safe
- Turntable Buying Guide 2026: How to Choose Your First Record Player
- Phono Preamp Explained: Why You Need One and How to Choose