A turntable headshell is the small removable platform that carries your cartridge at the end of the tonearm, and it does three jobs that most setup guides skip: it holds cartridge geometry, it adds mass the tonearm has to swing, and it passes four fragile signal wires from the stylus to the arm tube. Get any of those wrong and the deck plays, but it does not play right.
I have mounted cartridges on universal S-shaped arms, on the fixed integrated headshell of a Rega RB330, and on Pro-Ject and Technics arms that sit at opposite ends of the mounting-standard argument. The headshell layer is where more first-year setup mistakes live than anywhere else, because it looks trivial. It is not. A crooked cartridge in a beautiful headshell tracks worse than a straight cartridge in an ugly one, and the guides that leap straight to null points and Baerwald geometry quietly assume you already solved the mechanical layer underneath.
This guide is that missing layer. Wiring, weight, material, mount standard, screws, leads, and shims — the boring hardware that decides whether your alignment work holds. I will show you the gauge readings and the geometry, not adjectives.
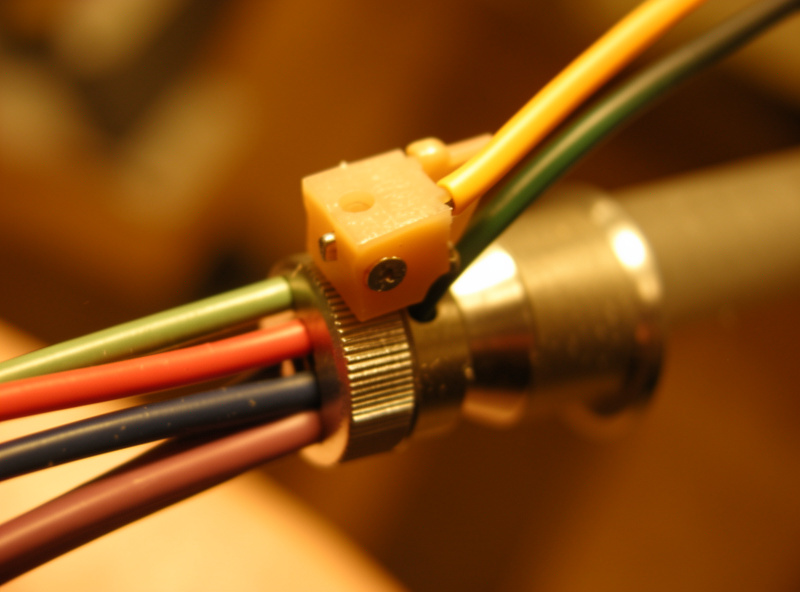
What Does a Turntable Headshell Actually Do?
A headshell mechanically couples the cartridge to the tonearm while setting overhang and offset angle, adding roughly 6 to 14 grams of mass to the arm’s front end, and routing the four cartridge output pins to the arm wiring through short lead wires. It is a structural, mechanical, and electrical part at once.
Think of it as three problems stacked in one aluminum shell. Structurally, the two mounting slots let you slide the cartridge forward and back to set overhang — the few millimeters of stylus overshoot past the spindle that your protractor dials in. Mechanically, the headshell’s mass combines with the cartridge mass and the arm’s effective mass to set a resonant frequency; land that in the wrong band and you get warp-wobble or mistracking. Electrically, four thin leads carry a signal measured in fractions of a millivolt, so a loose clip or an oxidized pin shows up as channel imbalance or intermittent dropout.
On my SL-1200-class deck the bayonet headshell pops off in a second, which is the whole point of the universal standard — I keep one cartridge per shell and swap the shell, not the cartridge. On the Rega, the cartridge bolts straight to the arm casting and there is no removable shell at all. Those two philosophies drive almost every decision in this cluster, and I cover them head-on in universal vs fixed headshells and which tonearm mount you have.
How Do You Wire a Headshell Correctly?
Cartridge leads follow a fixed color code: red is right positive (R+), green is right negative or ground (R−), white is left positive (L+), and blue is left negative (L−). The pins on the back of the cartridge are almost always labeled with those same letters, so wiring is a match-the-letters job — as long as you do not swap a channel or flip a phase.
The memory trick I use is “red and green live together, white and blue live together” — the two right-channel wires are red and green, the two left-channel wires are white and blue. Get red and white reversed and your channels swap; get red and green reversed on one channel and that channel is wired out of phase, which collapses the stereo image and thins the bass in a way that sounds like a bad pressing until you realize it is your own wiring. I have done it. First cartridge I ever mounted, I had L and R crossed and spent twenty minutes convinced the record was cut backwards before I checked the clips.
The clips themselves matter more than the color code once you have done it a few times. They are tiny sprung tubes that should grip the cartridge pin with a light click and stay put. If a clip is loose it drops out mid-play; if it is too tight you bend the cartridge pin forcing it on. The full color-by-color walkthrough, including how to re-tension a loose clip without snapping it, is in how to wire a headshell and cartridge lead colors explained.
Does Headshell Weight Change How Your Deck Sounds?
Yes, but not the way audio forums claim. Headshell mass matters because it sets the tonearm/cartridge resonant frequency, which should land between 8 and 12 Hz. Below 8 Hz you get warp and footfall wobble; above about 14 Hz you push into the audible band and lose bass control. A heavier headshell paired with a high-compliance cartridge is the classic mismatch.
The math is not optional here, and it is the single most misunderstood point in headshell selection. Effective mass (arm + headshell + screws + cartridge) works against cartridge compliance like a mass on a spring. A stiff, low-compliance moving-coil wants more effective mass; a springy high-compliance moving-magnet wants less. When people say a heavier headshell “tightened up the bass,” what usually happened is they nudged a mismatched resonance back toward the 8–12 Hz window by accident. When it made things worse, they pushed it out the other side.
I keep a light aluminum shell and a heavier one on the bench precisely so I can shift effective mass without changing arms. The full resonance calculation, with a worked example using an AT-VM95 and both shells, is in headshell weight and tonearm resonance and getting the match right. If you only read one spoke in this cluster, read that one — it is the difference between guessing and knowing.
Aluminum, Carbon, or Wood — Does Headshell Material Matter?
Material matters for two measurable reasons — mass and resonance damping — and for a lot of reasons that are marketing. Aluminum is the neutral default: predictable mass, cheap, rigid. Carbon fiber is lighter for the same stiffness and damps ringing well. Wood and magnesium sit at the boutique end, where the claims outrun the measurements.
Here is how I actually think about it. A headshell is trying to be dead — it should transmit the stylus’s job to the arm and turn its own vibration into heat, not ring like a bell. Aluminum rings a little; good carbon rings less; a well-chosen wood can be pleasantly dead but varies wildly by species and construction. The problem is that material and mass are tangled together, so a “carbon sounds better” test is usually really a mass test in disguise unless you weight-match the shells. I lay out the honest version — where material genuinely does something and where you are paying for looks — in aluminum vs carbon vs wood headshells and does material matter.

What Screws and Nuts Does a Cartridge Use?
Cartridge mounting hardware is standardized on M2.5 metric threads (a small number of older or exotic cartridges use imperial 2-56), and the screws come in a range of lengths from about 8 mm up to 20 mm. You want the shortest screw that clears the headshell and threads fully into the cartridge — too long and it bottoms out or fouls the arm.
The details that trip people up are length and material. A cartridge with tapped metal threads takes a screw from the top; a cartridge with a smooth through-hole takes a screw and a nut. Aluminum, brass, and nylon screws all exist, and nylon is not a gimmick — a nylon screw at one mounting point can shift resonance and, more usefully, will strip before it cracks a plastic cartridge body if you over-torque it. I ruined one cartridge body early on by cranking a steel screw into it “just a bit more,” so I now keep a set of nylon hardware for anything with a plastic housing. Sizes, lengths, thread pitch, and when nylon actually helps are covered in cartridge mounting screws and nuts and sizes, lengths, and nylon.
Are Upgraded Headshell Leads Worth It?
Mostly no, sometimes yes. Replacing a set of tired, oxidized, loose stock leads with clean, well-fitting leads is a real improvement — you are fixing a bad connection. Replacing perfectly good leads with $80 “silver-litz cryo-treated” leads for a sonic upgrade is where the snake oil starts and the measurements stop.
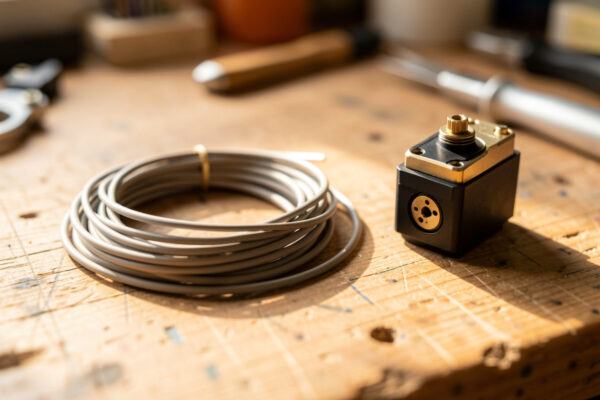
The signal at the headshell is tiny and high-impedance, so a genuinely bad connection there does audible damage: channel imbalance, intermittent crackle, a dead channel. Fresh leads with clips that grip properly fix all of that, and a $12 set of decent copper leads does it as well as a $90 set. Where I will spend a little is on clip fit and build quality, not exotic metallurgy — a clip that stays on the pin is worth more than any conductor claim. I make the full “what actually changes versus what you are imagining” argument, including a channel-balance check you can do by ear, in upgrading headshell leads and snake oil or real gain.
Can You Set VTA Without an Adjustable Tonearm?
Yes — cartridge shims and headshell spacers let you change vertical tracking angle on a fixed-height arm that has no VTA collar. A shim of roughly 0.5 to 1.5 mm under the cartridge or between headshell and arm tilts the cartridge, changing the stylus rake angle by a degree or two, which is often all you need.
This is the trick that saves the many decks whose arms do not adjust on the fly. VTA (really SRA, stylus rake angle) drifts when you change record thickness or cartridge height, and the “correct” setting is arm-tube-parallel-to-record as a starting point, tuned by ear from there. On a Rega, which fixes arm height, people add spacers under the arm base; on a fixed headshell you shim under the cartridge. It is fiddly, it changes VTF slightly so you re-check force after, and it works. The full method — shim materials, how much a given thickness moves SRA, and how to avoid chasing your tail — is in using cartridge shims to set VTA on a fixed headshell.
How Do You Set Cartridge Overhang in the Headshell Slots?
Overhang is set by sliding the cartridge forward or back in the headshell’s two mounting slots until the stylus lands on the null points marked by a two-point protractor. On a universal headshell you have roughly 8 to 10 mm of slot travel, which is enough to dial correct overhang for almost any cartridge on almost any arm.
This is where the headshell stops being hardware and starts being geometry, and it is the reason the removable slots exist at all. The protractor gives you two grid points — the inner and outer null radii, Baerwald at 66 and 120.9 mm or Stevenson if your arm was designed around it. You loosen the screws a quarter turn, nudge the cartridge, and check both nulls until the stylus sits dead-center on the grid lines with the cantilever parallel to them. Get one null perfect and the other off and your overhang is right but your offset angle (the slight twist of the cartridge in the slots) is wrong.
The mistake I see constantly is people tightening the screws before the final check and then wondering why the cartridge shifted — a snugged screw drags the cartridge a hair as it seats. I now hold the cartridge against the grid with a fingertip while I bring the screws up to final torque, then re-verify. A universal headshell makes this easy because you can pull the whole assembly off the arm, work at the bench under good light, and drop it back on. That workflow advantage is half the reason I run detachable shells at all, and it feeds straight into the alignment work the rest of this cluster assumes.
What Are the Universal Headshell Mount Standards?
The dominant universal standard is the bayonet mount — a four-pin connector with a collar that locks the headshell to an SME-type arm with a quarter turn. The pins are on a standard spacing, so headshells and arms from different makers generally interchange, which is the entire appeal of the “universal” name.
There is a little more nuance under the surface. The bayonet collar usually allows the headshell to rotate a few degrees before locking, and that rotation is your azimuth adjustment — the tilt that squares the stylus to the groove wall so left and right channels have equal crosstalk. On a fixed headshell you cannot rotate anything, which is one more reason the universal/fixed split, covered in universal vs fixed headshells, changes how you set the deck up. Some arms use a captive collet rather than a full bayonet, and a handful of older Japanese decks used proprietary shells that look universal but are not quite — always test-fit before you trust a bargain shell. When I buy a used headshell I check three things before it goes near a cartridge: that the collar locks without play, that all four pins are clean and un-bent, and that the finger-lift is solid, because a wobbly lift is a sign the shell has been dropped.
Headshell Types Compared
Here is how the common headshell classes stack up on the specs that actually drive a buying or setup decision. Weights are typical ranges for the class; your specific shell may vary, so weigh it before you calculate resonance.
| Headshell type | Typical mass | Mount standard | Best paired with | Main tradeoff |
| Stock aluminum (universal) | 8–10 g | Bayonet / SME | Mid-compliance MM cartridges | Rings slightly; neutral and cheap |
| Carbon fiber (universal) | 6–9 g | Bayonet / SME | Low-mass arms, high-compliance carts | Good damping; price per gram |
| Magnesium (universal) | 7–10 g | Bayonet / SME | Low-output MC on medium arms | Well damped; costs more, oxidizes |
| Wood-bodied (universal) | 9–14 g | Bayonet / SME | Heavier low-compliance MC | Variable by species; looks-led |
| Fixed / integrated (Rega-type) | N/A (arm-set) | Bolts to arm | Whatever the arm is voiced for | No swapping; shim for VTA |
| Heavy brass/steel | 14–20 g | Bayonet / SME | Very low-compliance MC | Can push resonance too low |
Read that table against your cartridge’s compliance number, not against which one looks best. A featherweight carbon shell under a stiff moving-coil can drop resonance out of the safe window just as easily as a brass slab under a springy moving-magnet. The resonance-matching spoke turns that table into an actual number for your setup.
What Order Should You Fix the Headshell Layer In?
Work outside-in: confirm your mount standard first, then wiring, then screws and mass, then leads, then VTA shims last. Doing it in that order means each step holds still while you set the next — there is no point shimming VTA before you have the cartridge bolted straight and the leads solid.
Concretely, the sequence I run on any new headshell is: identify whether the arm is universal or fixed so I know what I am even working with; wire the four leads by color and confirm the clips grip; pick the right screws and set the cartridge straight in the slots for overhang; weigh the assembled shell and sanity-check resonance; only then worry about lead quality and finally shim VTA. That order is the whole reason this cluster exists — the alignment guides start where this one ends.
How Do You Keep Headshell Contacts Clean?
Headshell contacts fail from oxidation and dust, not wear, and the fix is a periodic clean of the four bayonet pins and the cartridge clips with a dry contact-cleaning swab or a whisper of isopropyl on a lint-free tip. A dirty four-pin junction is the single most common cause of a channel that fades in and out on an otherwise healthy deck.
The signal path from stylus to phono stage passes through more connections than people realize — cartridge pin to clip, clip to lead, lead to headshell pin, headshell pin to arm socket — and every one of them is carrying fractions of a millivolt at high impedance. Any of those can oxidize. When a deck develops an intermittent channel or a faint scratchy crackle that changes when you wiggle the headshell, I clean the bayonet junction first and fix it nine times out of ten before I touch the cartridge. Do not flood the joint with fluid, do not use an abrasive, and let it dry fully before you play. The one time I got impatient and reseated a still-damp shell, I got a burst of hum until it dried out — a five-minute wait would have saved me the scare. This maintenance layer is exactly why fresh, well-fitting leads matter more than exotic ones, the argument I make in full in upgrading headshell leads.
The Headshell Mistakes I See Most Often
The most common headshell mistakes are, in order: crossed or out-of-phase wiring, over-torqued screws that crack a cartridge body or drag it out of alignment, a mass mismatch that puts resonance outside the 8 to 12 Hz window, and chasing VTA by ear before the cartridge is even mounted straight. Every one of them is preventable at the bench.
What ties them together is impatience. The headshell layer rewards a slow, ordered hand — wire it, mount it straight, weigh it, then and only then start tuning. I have made every one of these mistakes at least once, which is why I can spot them fast now: the phase error that thinned the bass, the steel screw I cranked into a plastic body, the featherweight shell that dropped a stiff moving-coil’s resonance down into warp territory. If you treat the headshell as the mechanical foundation it is, rather than a cosmetic afterthought, the alignment work stacked on top of it stays put. That is the whole thesis of this cluster, and each spoke is one layer of it done properly — from wiring through shimming VTA.
For the geometry that comes after the hardware is solid — overhang, offset, and the null points — the mounting standards are documented directly by makers like Rega and the SME/bayonet universal fitment used across Audio-Technica cartridges and headshells, both of which are worth reading straight from the source before you buy hardware that has to fit.
As an Amazon Associate I earn from qualifying purchases. If you need spares, a basic universal headshell and a set of cartridge mounting screws are the two things worth keeping on the bench.
Are all turntable headshells interchangeable?
No. Universal bayonet or SME-fitting headshells swap freely between compatible S-shaped and detachable-headshell arms, but fixed integrated arms like the Rega RB330 have no removable headshell at all. Confirm your arm’s mount standard before buying a replacement shell.
What do the headshell wire colors mean?
Red is right positive, green is right negative, white is left positive, and blue is left negative. The pins on the back of the cartridge carry the same letters, so you match colors to letters. Swapping red and white swaps your channels; swapping the two wires on one channel wires it out of phase.
Does a heavier headshell sound better?
Not inherently. Headshell mass sets the tonearm and cartridge resonant frequency, which should land between 8 and 12 Hz. A heavier shell suits a stiff low-compliance cartridge, while a lighter shell suits a springy high-compliance one. Weight only helps when it moves resonance into that safe window.
What size screws mount a cartridge?
Most cartridges use M2.5 metric screws in lengths from about 8 mm to 20 mm. A few older designs use imperial 2-56 threads. Choose the shortest screw that threads fully into the cartridge without bottoming out, and consider nylon screws for plastic-bodied cartridges to avoid cracking the housing.
Can I adjust VTA without an adjustable tonearm?
Yes. Cartridge shims or headshell spacers of roughly 0.5 to 1.5 mm tilt the cartridge and change stylus rake angle by a degree or two, which substitutes for a VTA collar on a fixed-height arm. Re-check tracking force afterward, because shimming changes it slightly.
Further Reading
- Universal vs Fixed Headshells: Which Tonearm Mount You Have
- How to Wire a Headshell: Cartridge Lead Colors Explained
- Headshell Weight and Tonearm Resonance: Getting the Match Right
- Aluminum vs Carbon vs Wood Headshells: Does Material Matter?
- Cartridge Mounting Screws and Nuts: Sizes, Lengths, and Nylon
- Using Cartridge Shims to Set VTA on a Fixed Headshell